Setup Guide for Managers
This guide summarizes the steps managers need to go through so their teams can work in Yalo Sales Desk, as well as the best practices for setup.
Logging in for the first time
Once Yalo has finished implementing the environment for your organization, you will receive a link with instructions for your first login.
Upon your first successful attempt to log in, you must define your new password.
Keep in mind that this password is specific to your account and you must never share it with anyone.
Accessing the Admin Panel
All management settings for Yalo Sales Desk are centralized and accessible through the Admin Panel. You need to access it in order to set up your teams.
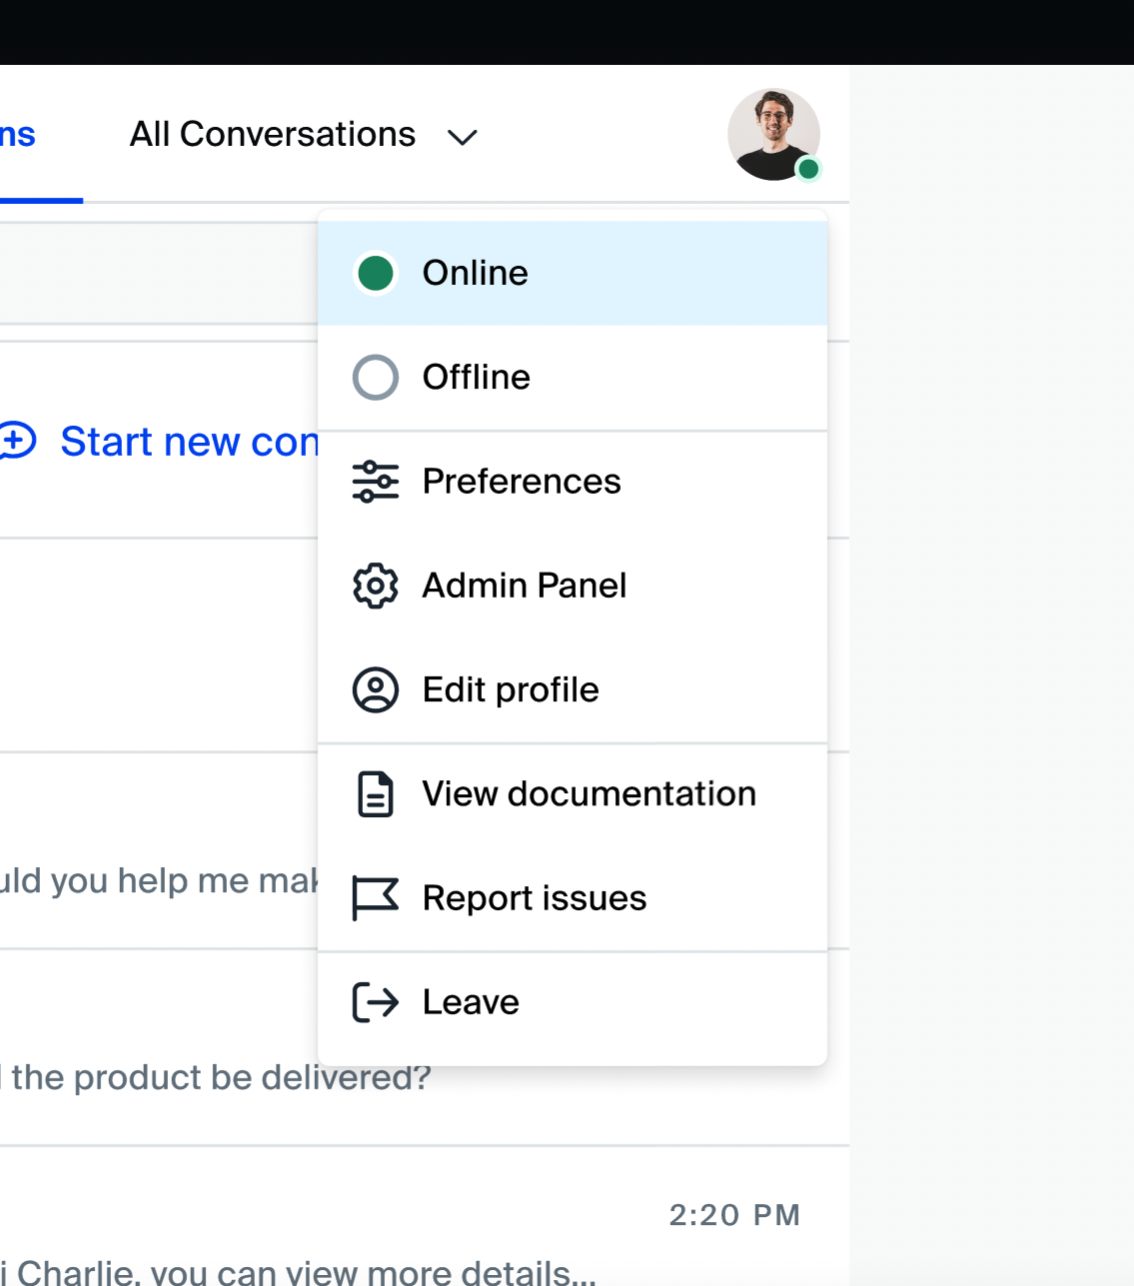
To access the admin panel:
Click your profile picture, then select Admin Panel.
Creating teams in your organization
The first step to getting your teams working in Yalo Sales Desk is to create Teams.
To do this:
- Click Teams in the navigation menu.
- Click New team to open the team creation form.
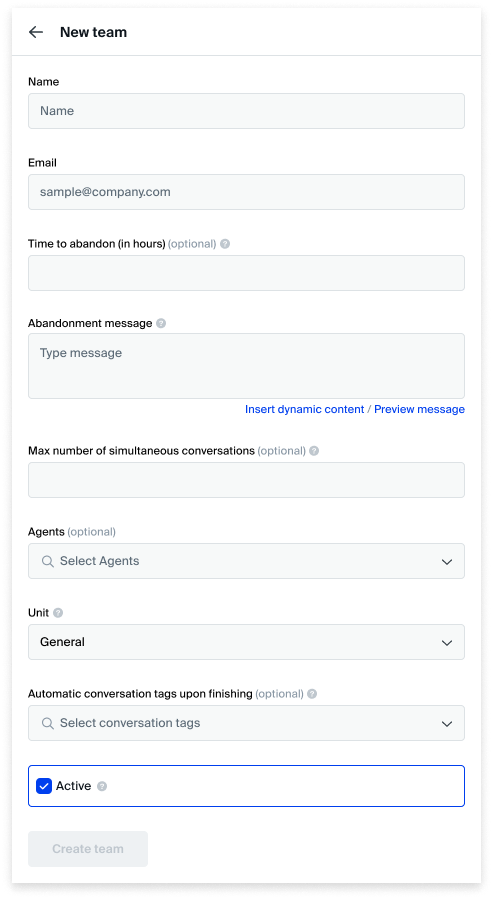
- Define the Team name.
- Provide an e-mail address for the team. This e-mail will receive notifications and reports about the team.
- Define the time for abandonment, which is how long the conversation can remain in the conversation list without receiving replies before it closes automatically.
- Write the abandonment message. This message will be sent when the conversation is automatically closed due to a lack of replies.
- Define the maximum cap for simultaneous conversations the user can be responsible for at any given moment.
- You can assign Teams under Units to facilitate grouping teams for supervision. This option is set to the "General" unit by default. Click the selector and choose "Create new unit" to create a new unit. Supervisors will have access to all conversations in teams belonging to their units, and can also manage agents from these teams.
- Click Create team to finish.
You can repeat this process to create as many teams you need.
Adding users to your teams
Once you're done creating teams, the next step is to fill these teams with users.
To do this:
- Click Users in the navigation menu.
- Click New user to open the user creation form.
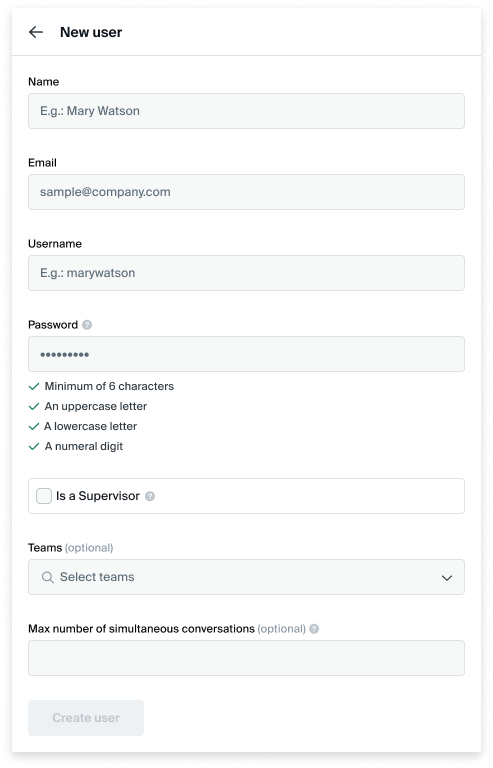
- Fill in the user's name and e-mail address.
- The system will automatically define a username from the user's e-mail.
- Create a password. The user will have to define a new password after logging in.
- Are they an agent or a supervisor?
- Agents only have access to conversations belonging to teams they're assigned to, and can't change settings in the Admin Panel.
- Supervisors have access and administrative permissions for teams belonging to Units they're assigned to.
- If they are a supervisor, mark the Is a Supervisor box. If you do this, the Teams selector will change to the Units selector.
- Select the Teams or Units the user will be responsible for.
- Click Create user to finish.
You can repeat this process to add as many users you need, as long as you have available seats.
Creating a New Business Hour
- Create New Business Hour:
- Click on "New" to start configuring a new business hour.
- Define Business Hour Details:
- Name: Enter a name for the business hour.
- Team/Department: Select the team or department that this business hour will apply to.
- Timezone: Set the appropriate timezone.
- Days and Hours: Choose the days of the week and set specific hours for each selected day.
- Save Configuration:
- After entering all details, save the configuration to create the new business hour.
Creating custom fields
Once you're done adding users, you can set the stage for them to have better context when dealing with customers by providing Managing custom fields for them to use under contact details.
To do this:
- Click Custom fields in the navigation menu.
- Click New custom field to open the custom field creation form.
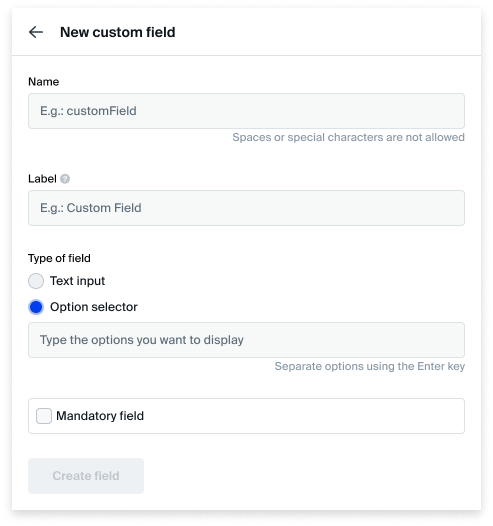
- Define the Field name. Keep in mind it can't contain spaces or special characters such as _ or *.
- Define the Label for the custom field. It should be short and familiar for your agents to understand.
- Choose whether the field will be a text input or a selector. If it is a text input, users will be able to type whatever value they want in it. If it is a selector, you must define which options users can choose from.
- If you picked the Selector option, an input will appear for you to define the options for users to choose from. Separate them with the Enter key.
- Tick the checkbox if you want the field to be mandatory. Otherwise, it will be optional.
- Click Create field to finish.
You can repeat this process to create as many custom fields you like.
Creating contact tags
Besides custom fields, an important element of contact details inside Sales Desk are contact tags. They provide a way to classify your customers and provide a simple way for segmentation.
To create contact tags for your teams:
- Click Tags in the navigation menu, then click Contact Tags.
- Click New tag.
- Type a name for the new tag.
- Click Create.
You can repeat this process to create as many contact tags your teams need.
Creating conversation tags
There are also tags for conversation. They work like contact tags, but they can be assigned to conversations instead of contacts. To create them:
- Click Conversation tags in the navigation menu.
- Click New tag.
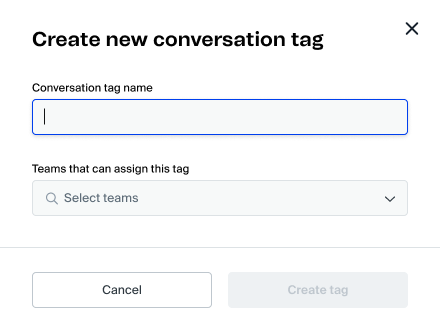
- Type a name for the new tag.
- Select the teams allowed to use the tag.
- Click Create tag.
You can repeat this process to create as many conversation tags your teams need.
Creating quick messages
Sales Desk allows you to create standardized messages for your agents to use in conversation and respond consistently to common situations. To do this:
Click Quick messages in the navigation menu.
Click New quick message.
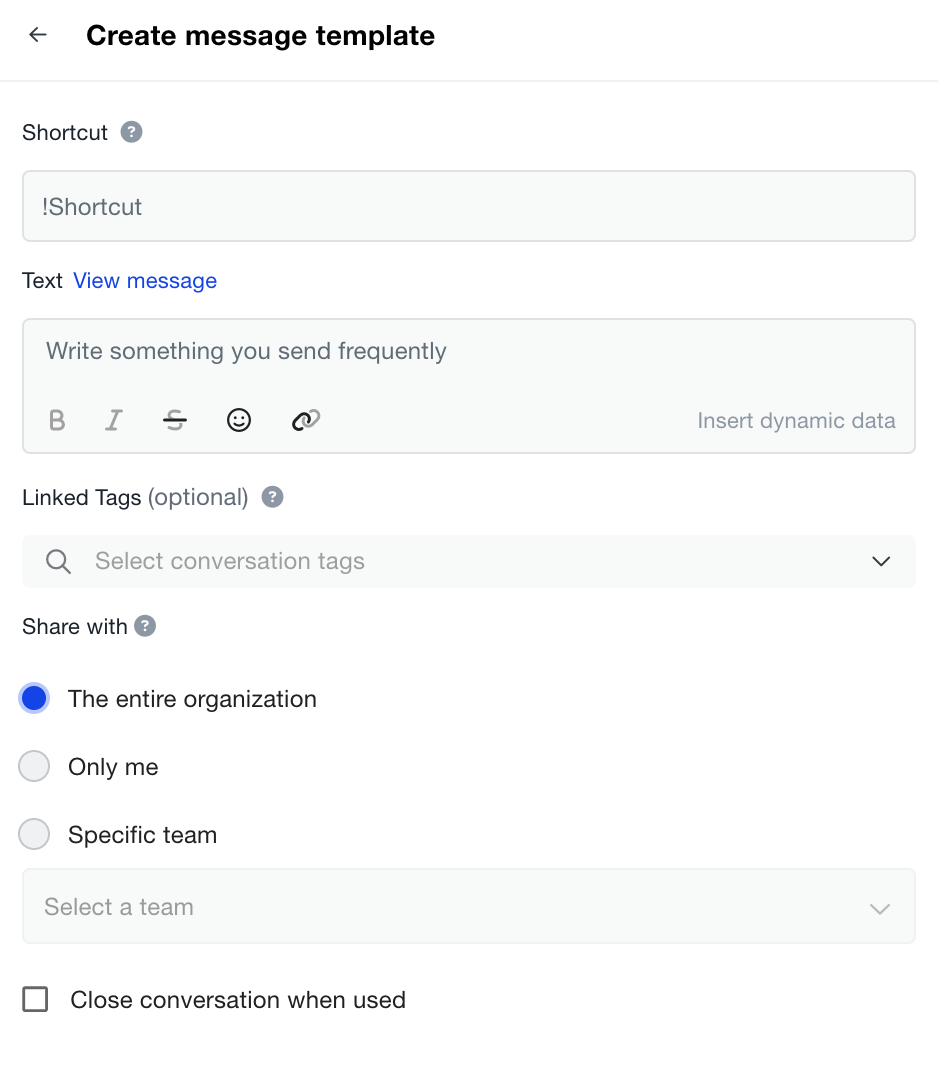
Type a shortcut for the new quick message.
Write the message to be used. You can ensure that each response is customized with the customer name, email, phone, agent's name, and email, using dynamic content placeholders.
Optionally, select conversation tags you want the system to assign to conversations when the quick message is sent.
Define who can use the message: the entire company, only you or a specific team.
Optionally, Close conversation when used you want the system to close the conversation when the quick messages sent by agents.
Click Create quick message to confirm.
You can repeat this process to create as many quick messages your teams need.
That's all you need to know to get started with Sales Desk. As your team enters the platform, you might want to share the Agent guide with them!
Updated 16 days ago