Promotions Manager
General Settings
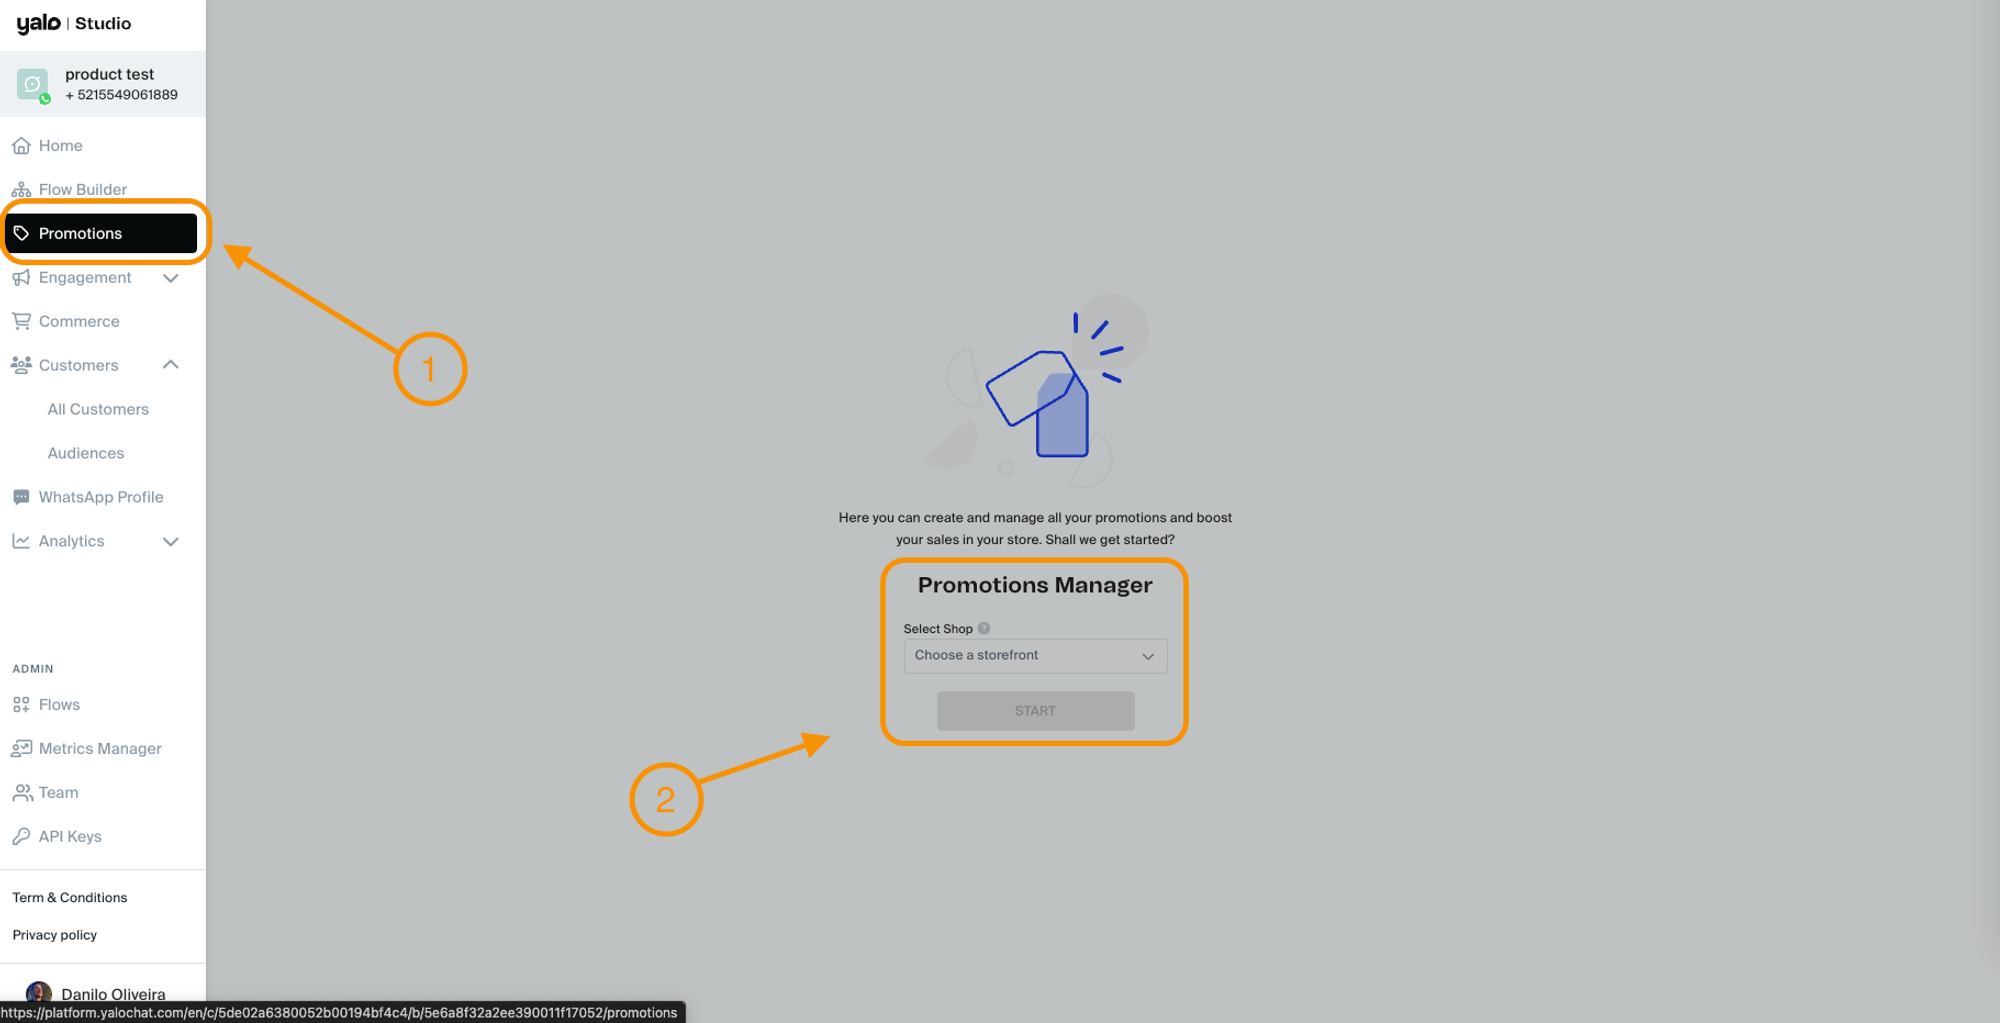
- In the right sidebar menu, navigate to the Promotions button, then select the desired storefront as indicated in step 2.
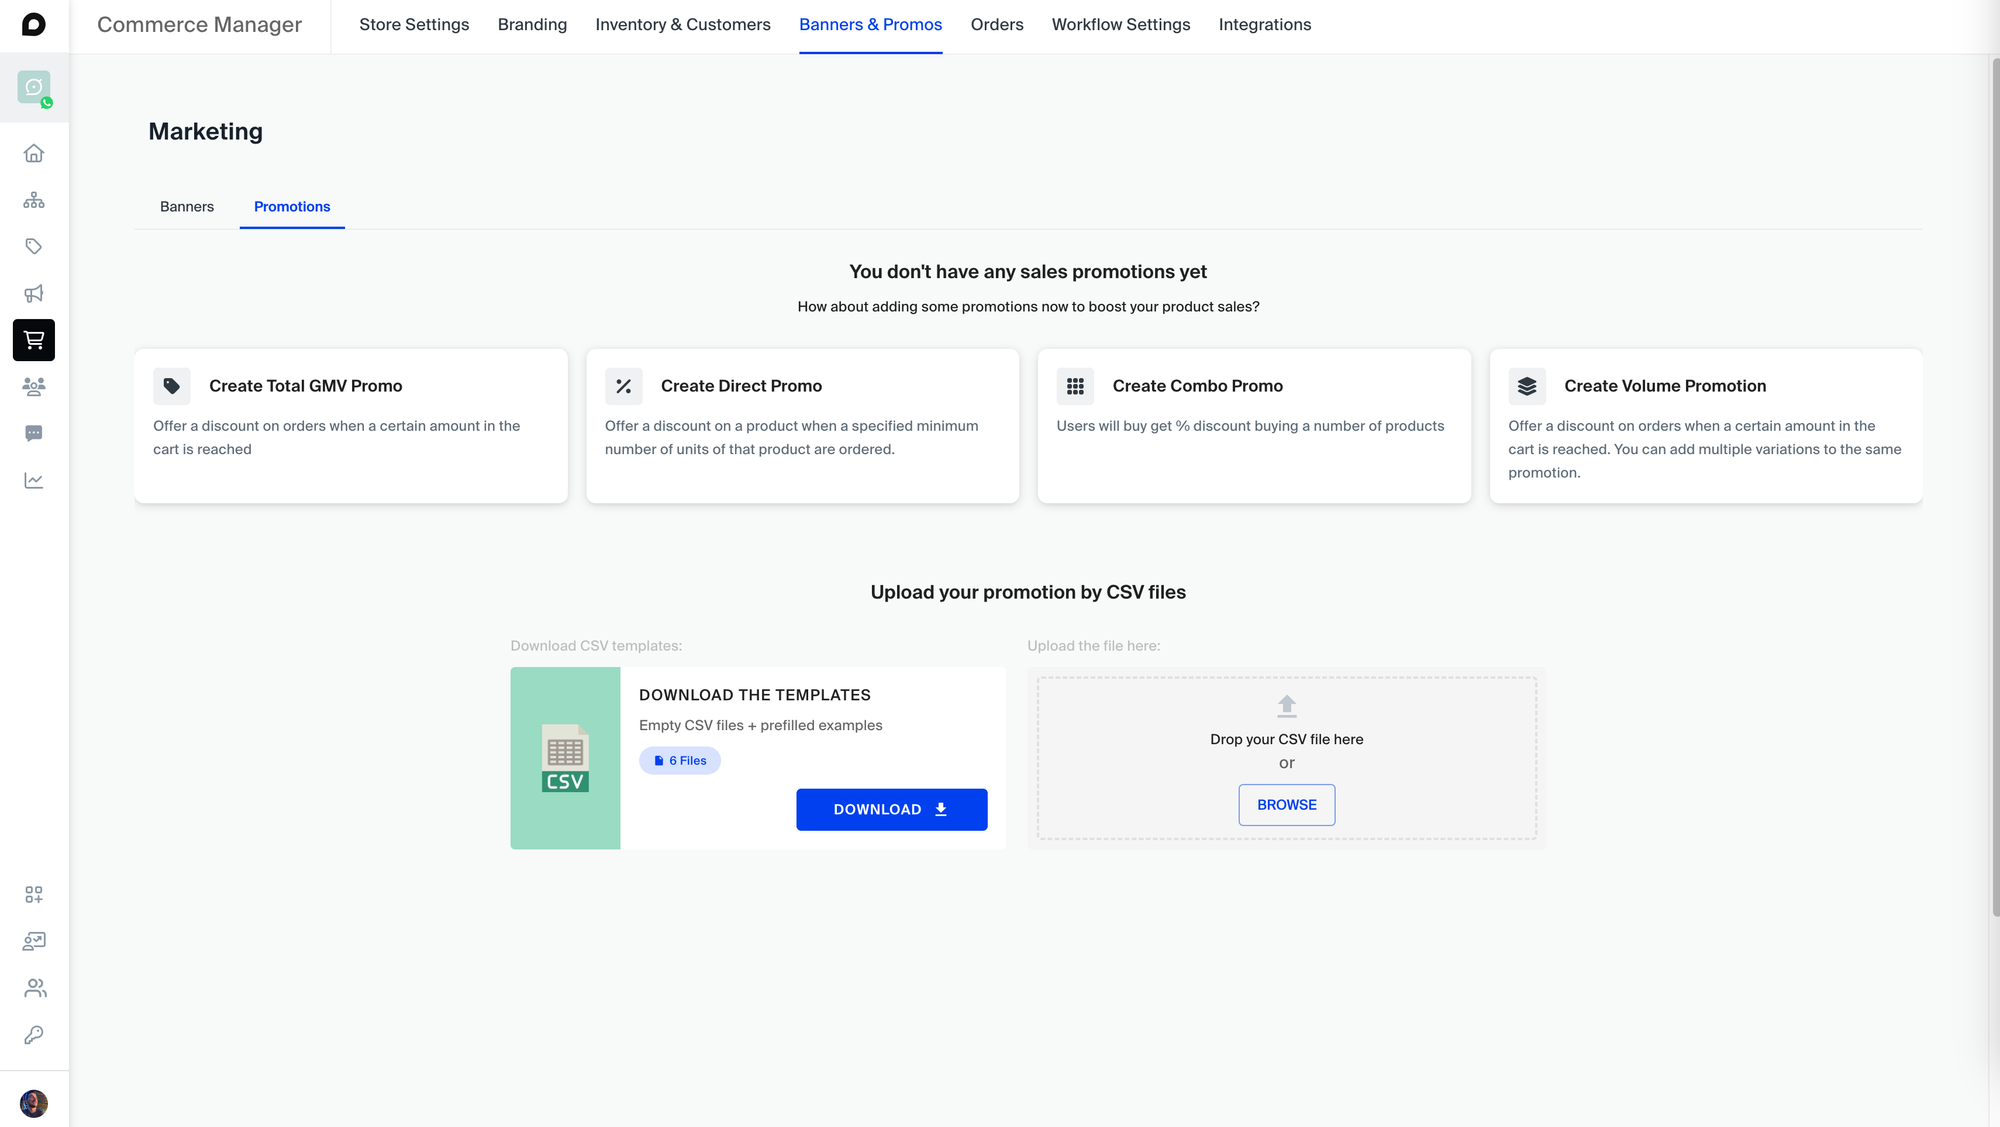
- If you don't have a promotion created yet, this will be the view in the promotions module. In this listing, you can create the main types of promotions and also upload a CSV file.
- If you already have created promotions, this will be your view.
Important: When creating new promotions, they will appear at the end of the list.
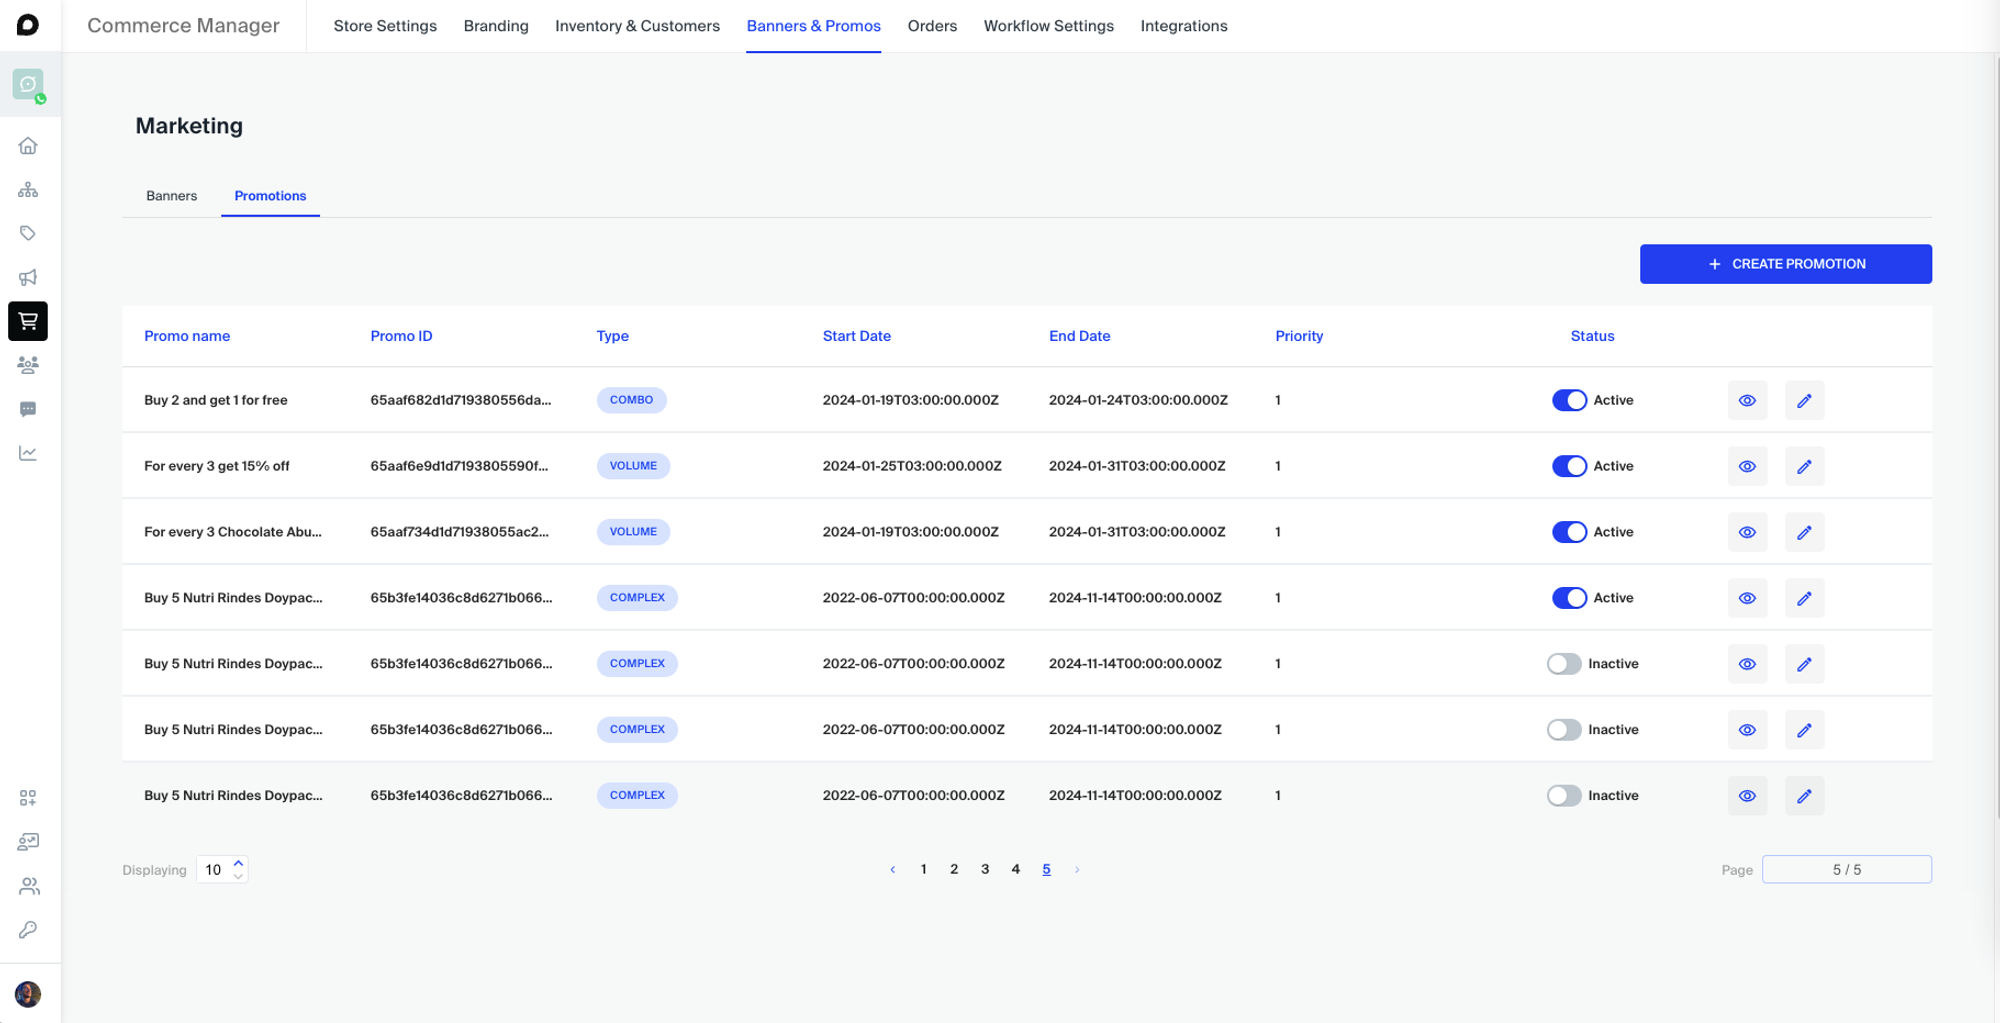
- If you already have promotions created, simply click on the Create Promotion button in the upper right corner.

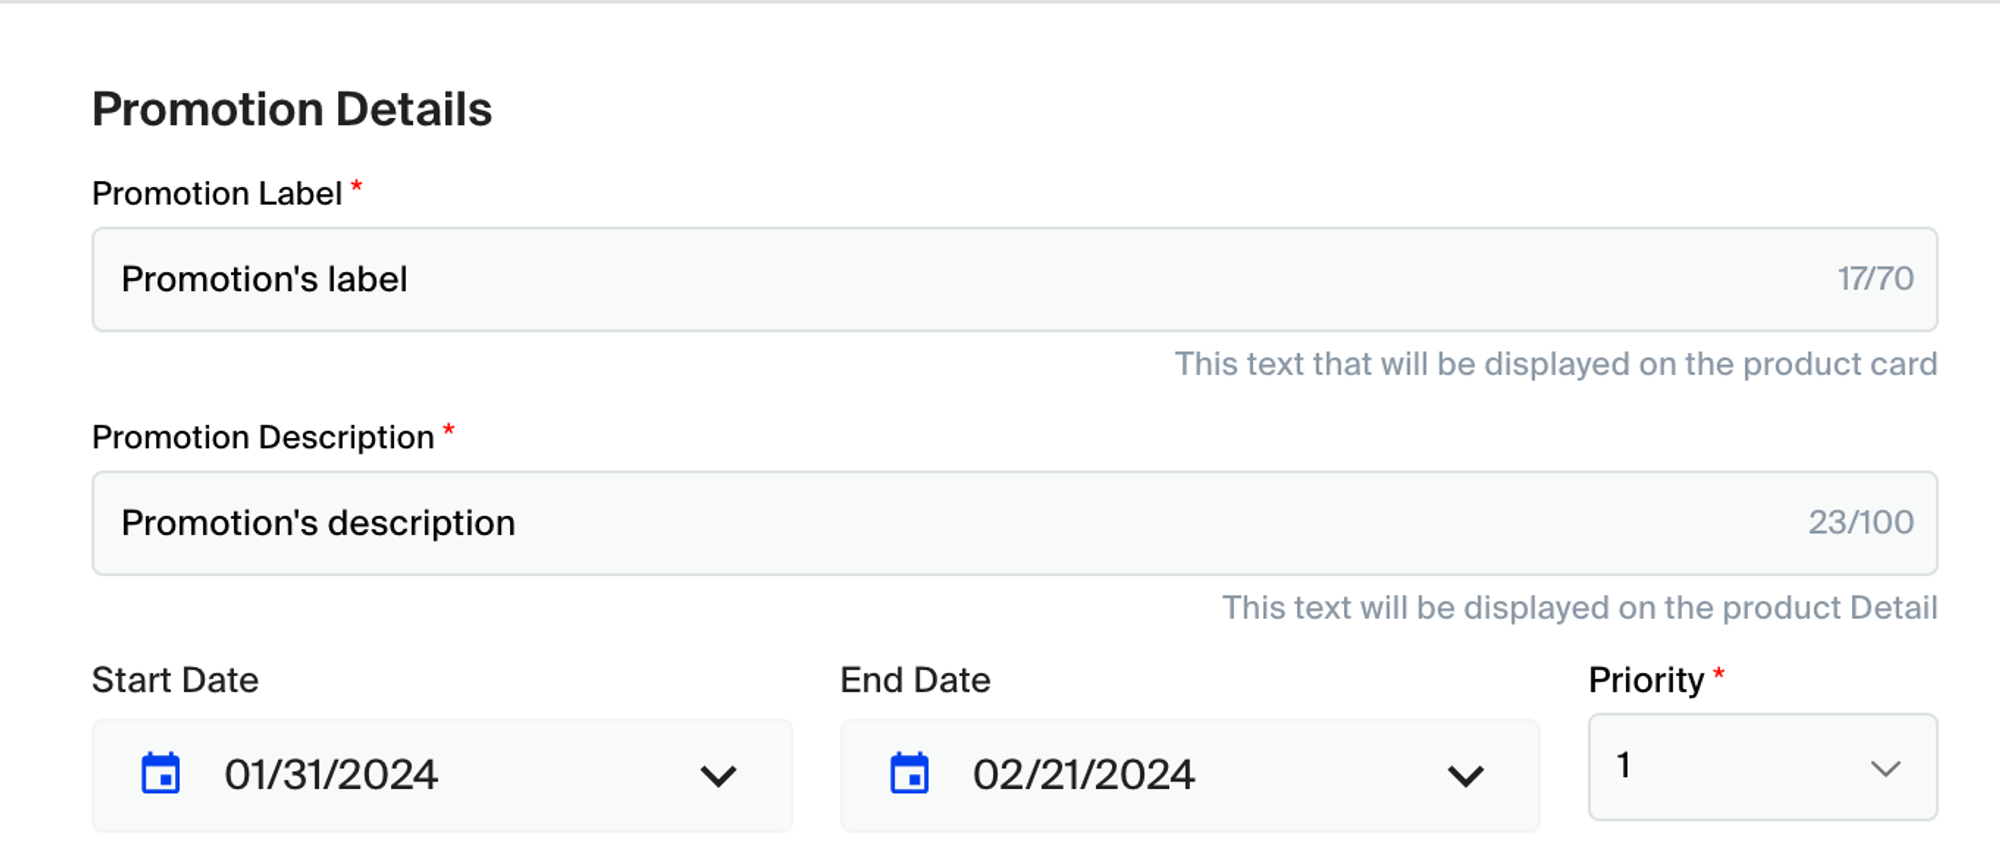
Every promotion should include the following details:
Promotion Label - The text entered in this field will be displayed on the product card.
Promotion Description - The text entered in this field will be displayed in the product details.
Start Date - Start date of the promotion's validity.
End Date - End date of the promotion's validity.
Priority - In this field, you should enter the priority of the promotion activation, with 1 being the highest priority.
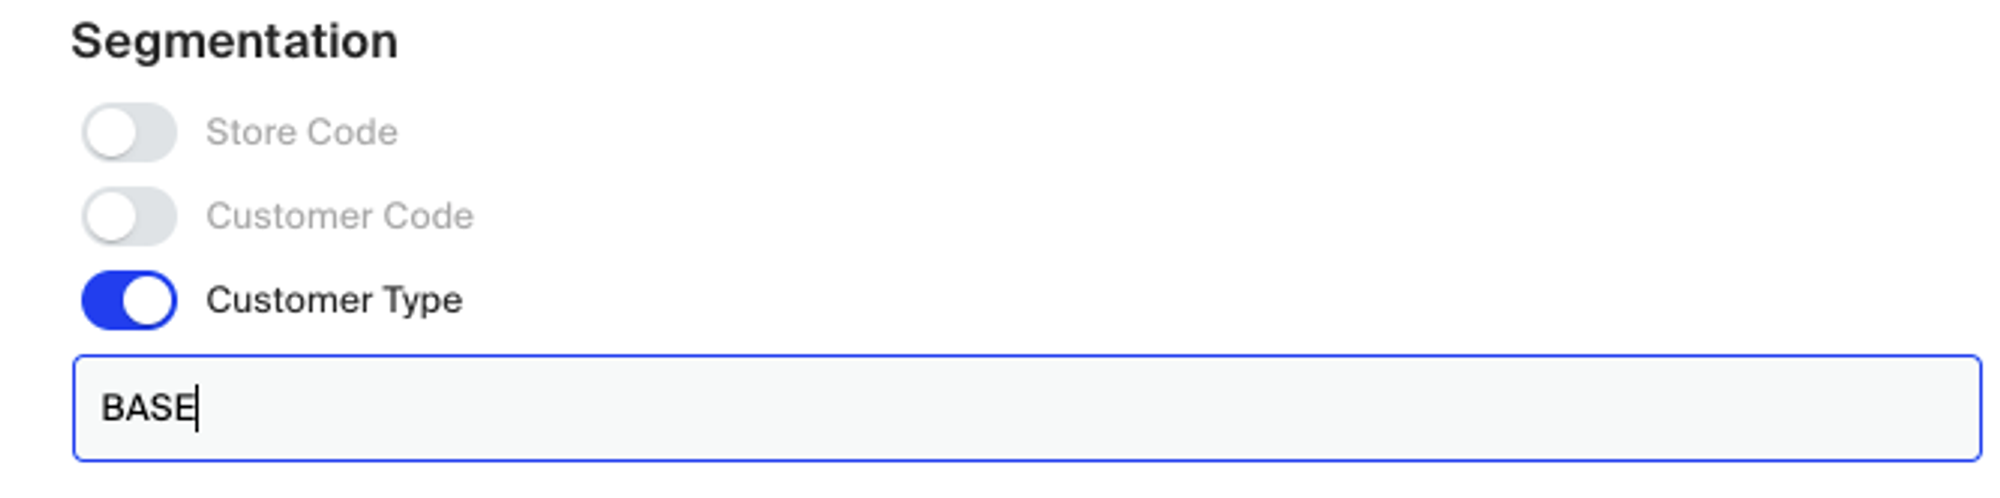
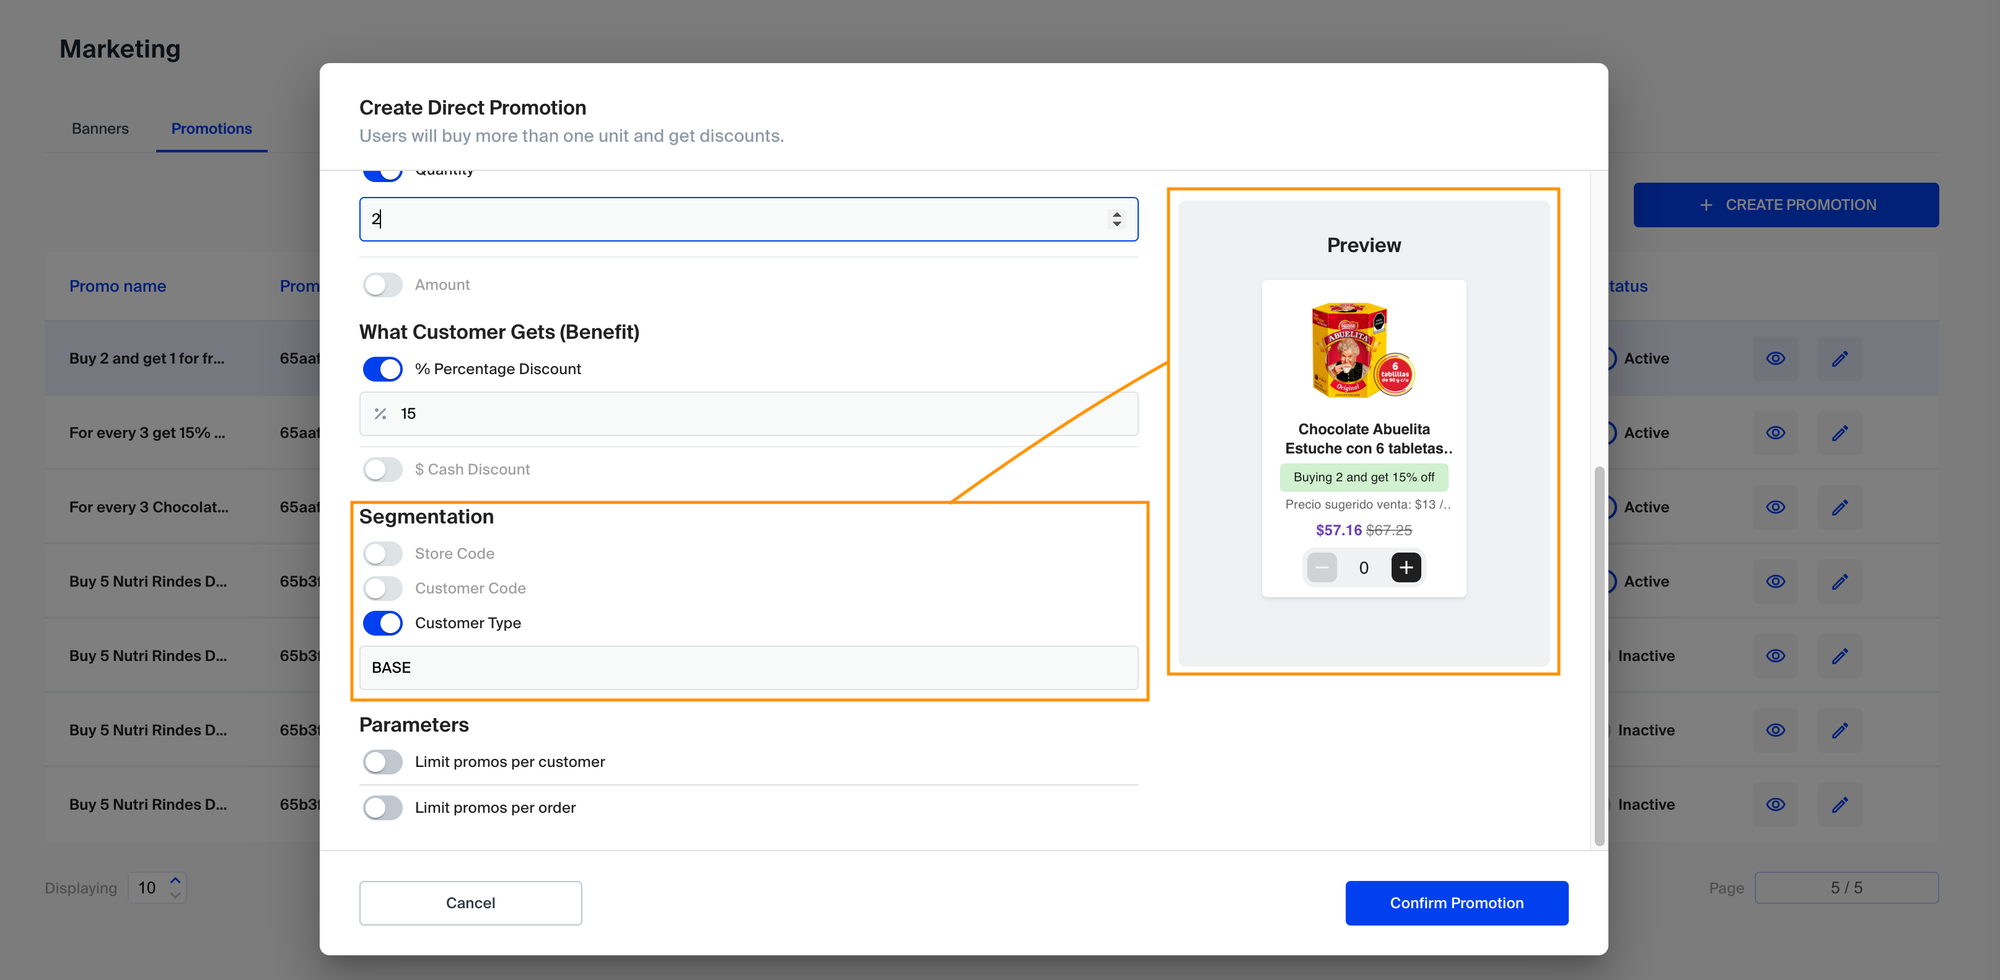
Every promotion should have the following segmentation options:
StoreCode - Used to segment which store will have the promotion available, used by clients with more than one distributor.
Customer Code - Used to segment the promotion only by the inserted customer codes.
Customer Type - Used to segment the promotion to a group of customers, related to the customer type of the customers in the customer listing.
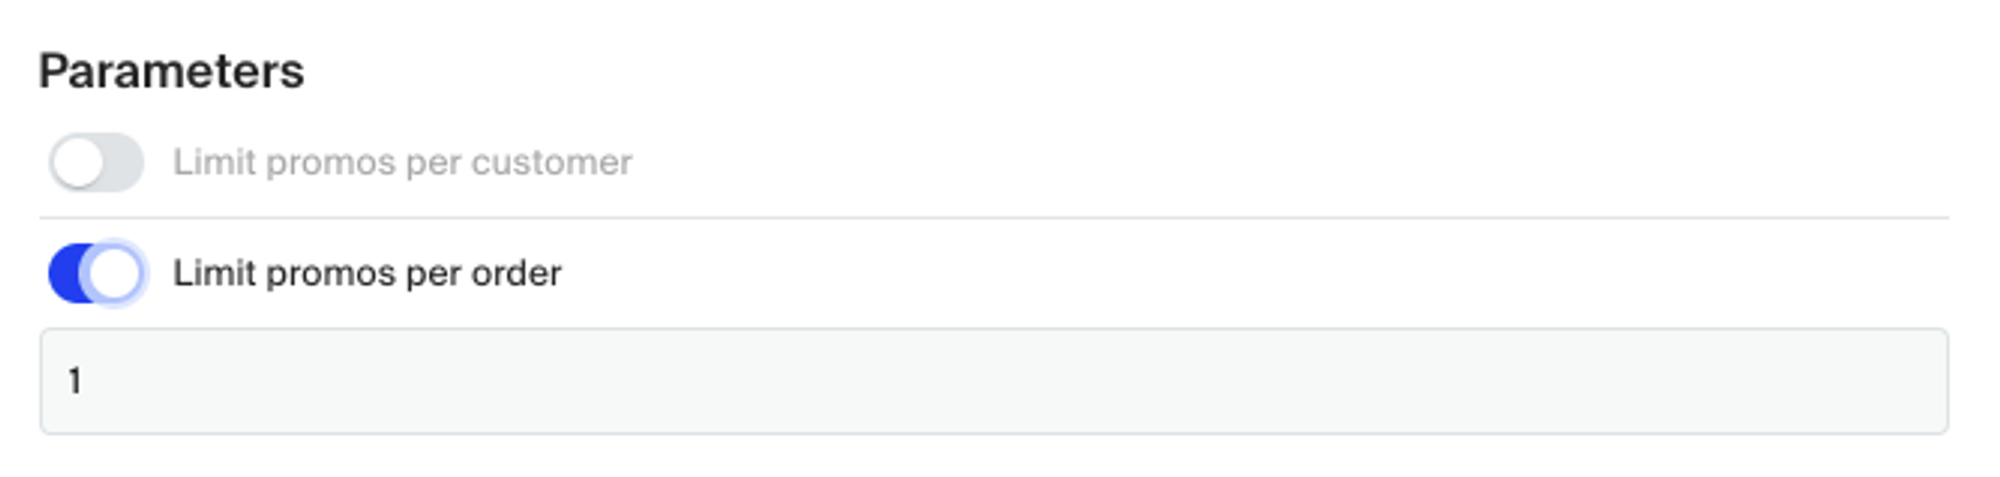
Every promotion should have the following limitation options:
Limit promos per customer - Used to limit how many orders with the promotion a customer can have.
Limit promos per order - Used to limit how many times a promotion can be activated on the same order, used for types Direct and Combo.
Note: The promotion preview, where you can see how the product card will be displayed, will only show products available to customers linked to the segmentation customer type
Configuring a Promotion
We can separate the promotion settings as follows:
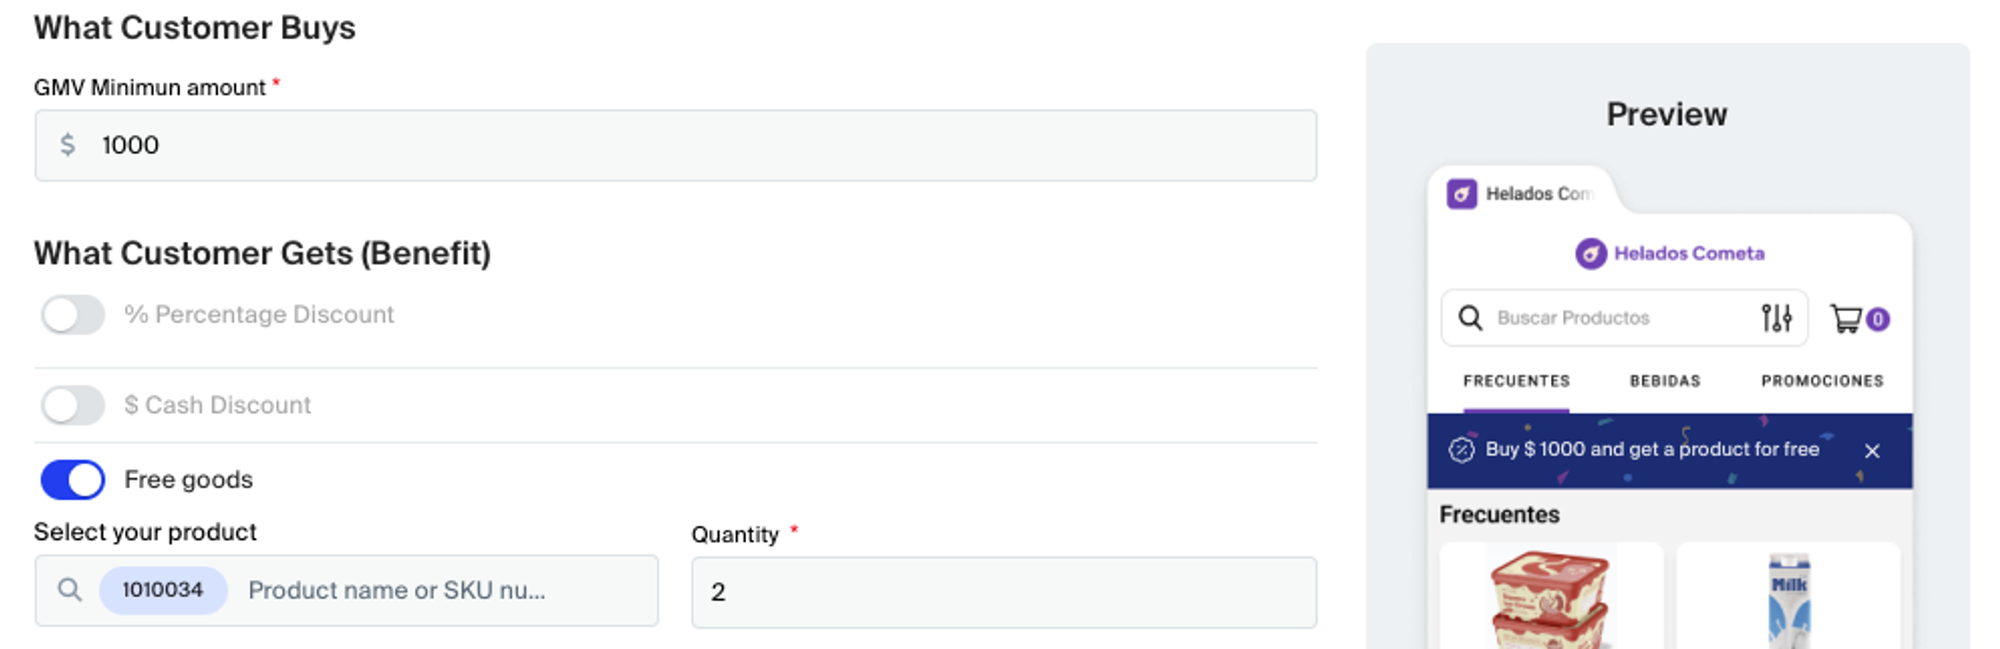
Customer Buys - What the a customer need to buy to active a promotion.
Customer Gets - What the customer will receive once he/her active a promotion.
In this step, we'll see how to configure promotions and their parameters, similar to how they are configured via CSV file, but through a user-friendly interface.
Configuring a Promotion - Total GMV Promo
Options available in Customer Buys
For this promotion, the Minimum amount is available, where you can define how much a customer should buy in the total order to receive a benefit.
Options available in Customer Gets
In this promotion, you must select 1 of the following available benefits:
% Percentage Discount - Percentage discount on the total order.
$ Cash Discount - Nominal discount on the total order.
Free goods - Free product in the desired quantity.
Configuring a Promotion - Direct
Options available in Customer Buys
In this promotion, you must select 1 of the following activation options:
Product - Should select a product to activate the promotion.
Quantity - Used to define the quantity of units of the specified product to activate the promotion.
Amount - Used to define the $ spent value of the specified product to activate the promotion.
Options available in Customer Gets
In this promotion, you must select 1 of the following available benefits:
% Percentage Discount - Percentage discount on the product selected in Customer Buys.
$ Cash Discount - Nominal discount on the product selected in Customer Buys.
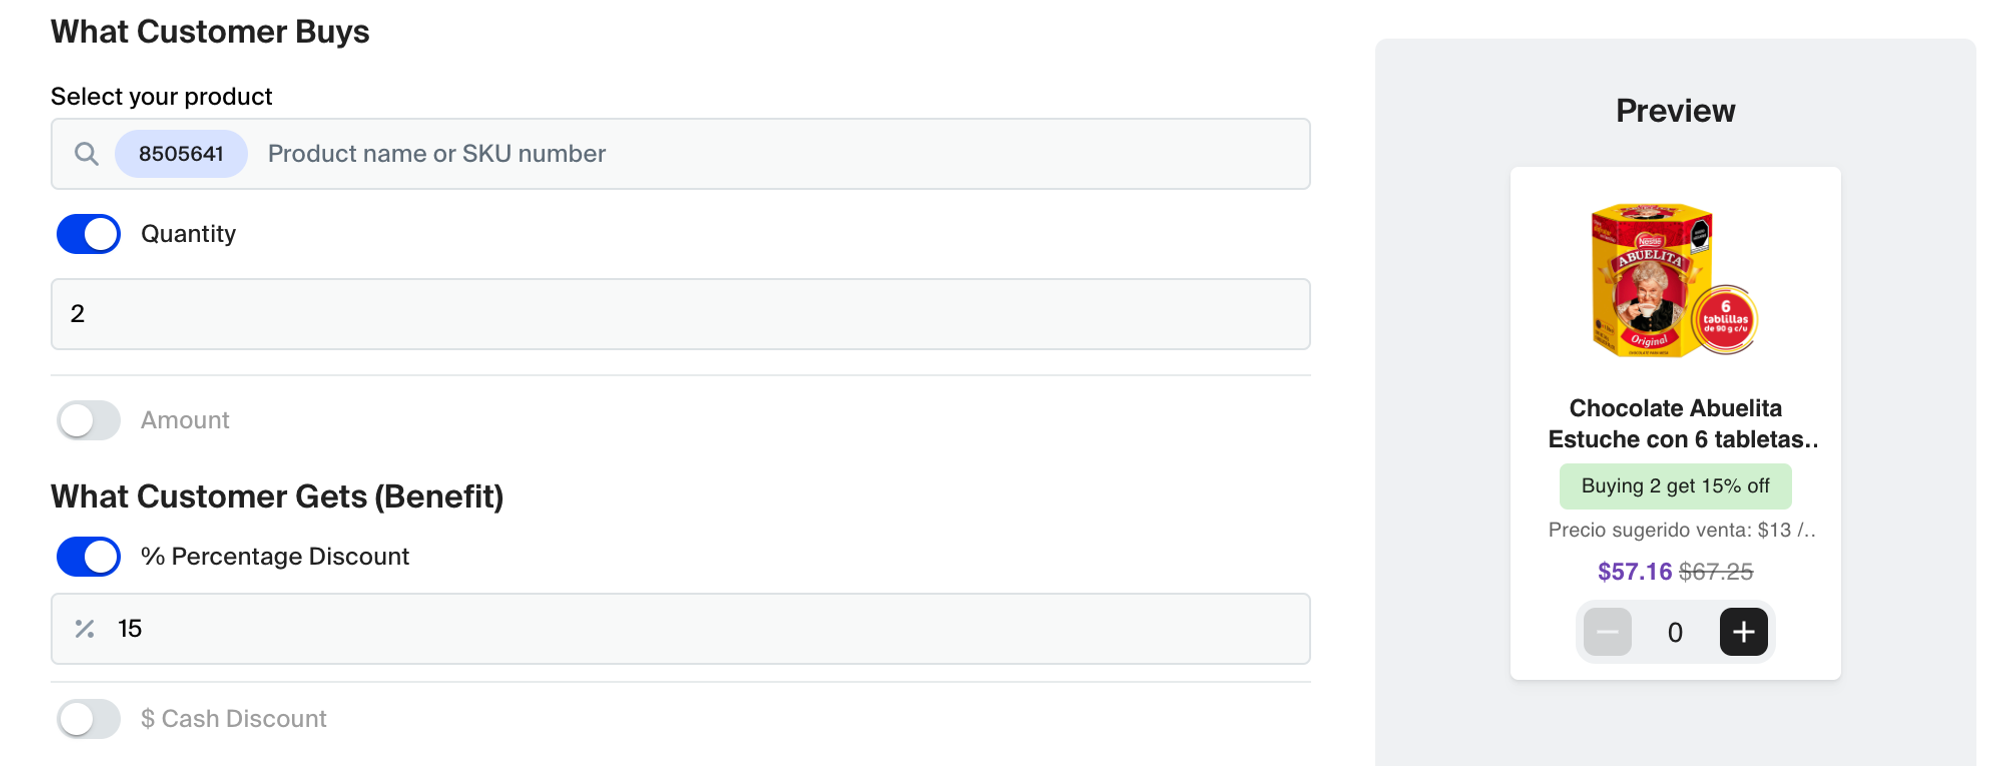
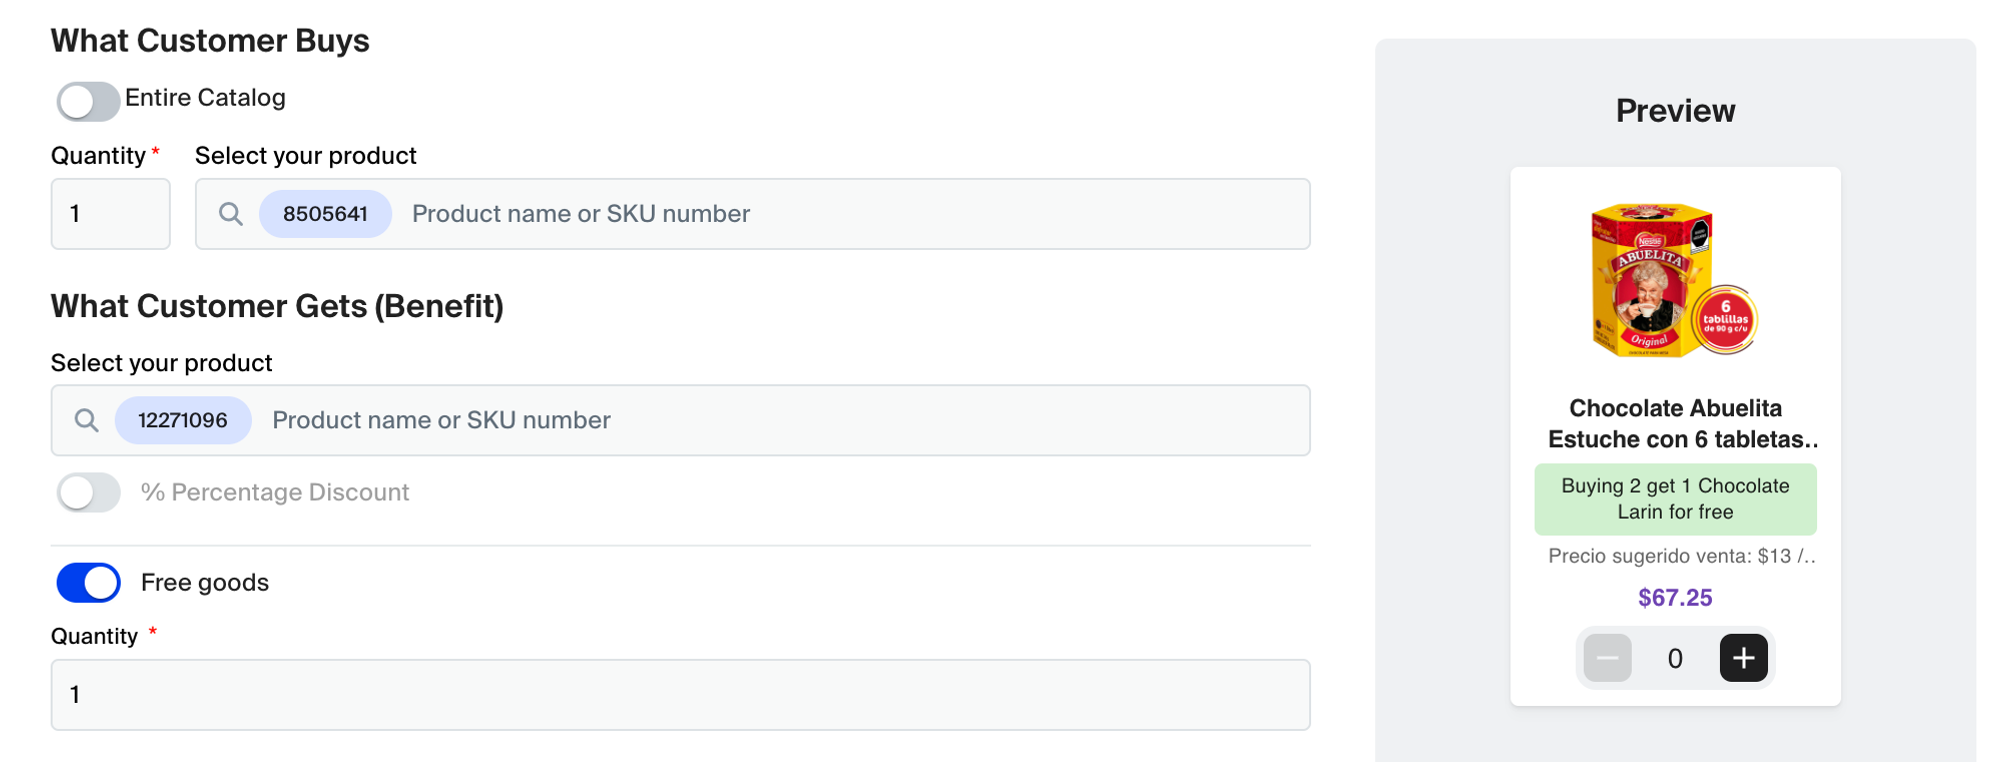
Configuring a Promotion - Combo
Options available in Customer Buys
In this promotion, you must select 1 of the following activation options:
Product - Should select a product to activate the promotion.
Quantity - Used to define the quantity of units of the specified product to activate the promotion.
Entire Catalog - If you don't want to specify a specific product, you can select the entire catalog. In this option, you only need to select the quantity. So, if the consumer buys any product in the specified quantity, the promotion will be activated.
Options available in Customer Gets
In this promotion, you must select 1 of the following available benefits:
% Percentage Discount - Percentage discount on the product selected in Customer Gets.
Free Goods - Free product in the defined quantity.
Note: In this type of promotion, you can grant a free good equal or different from Customer Buys
Configuring a Promotion - Volume
Options available in Customer Buys
In this promotion, you must select 1 of the following activation options:
Product - Should select a product to activate the promotion.
Quantity - Used to define the quantity of units of the specified product to activate the promotion.
Note: In this promotion quantity, it's the minimum necessary to activate the promotion, not a specific quantity.
Entire Catalog - If you don't want to specify a specific product, you can select the entire catalog. In this option, you only need to select the quantity. So, if the consumer buys any product in the specified quantity, the promotion will be activated.
Options available in Customer Gets
In this promotion, you must select 1 of the following available benefits:
% Percentage Discount - Percentage discount on the product selected in Customer Gets.
$ Cash Discount - Nominal discount on the product selected in Customer Buys.
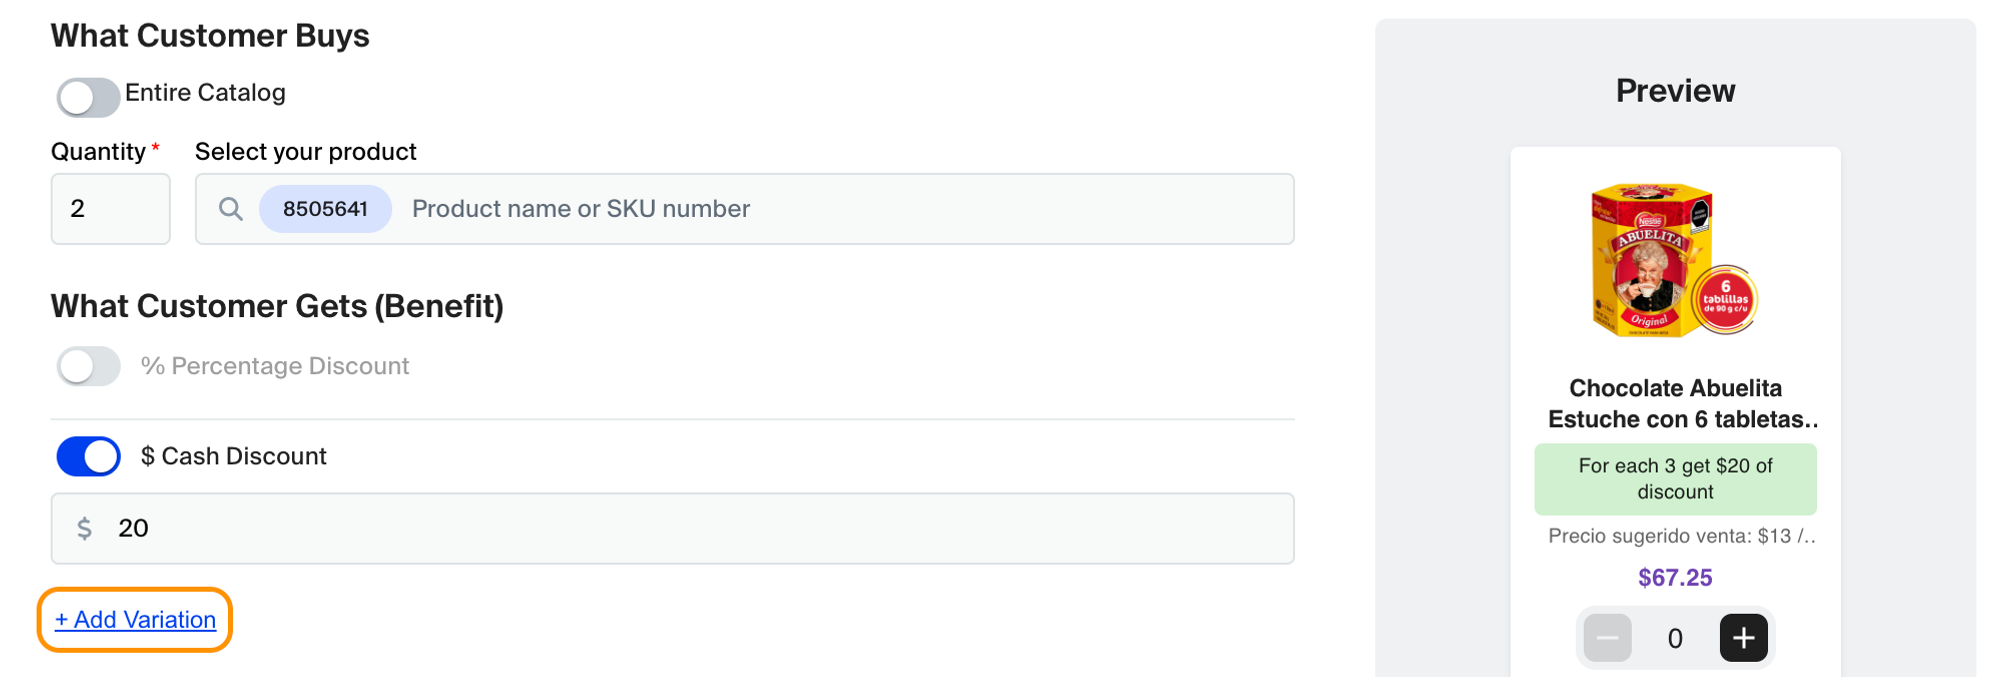
For this type of promotion, it's also possible to add a variation. By clicking + Add Variation, you can add more levels to the promotion. Since it's a volume promotion, you can create different minimums for activation/benefit.

Rule: Once the customer reaches the variation with the highest quantity, the mechanism disregards previous variations.
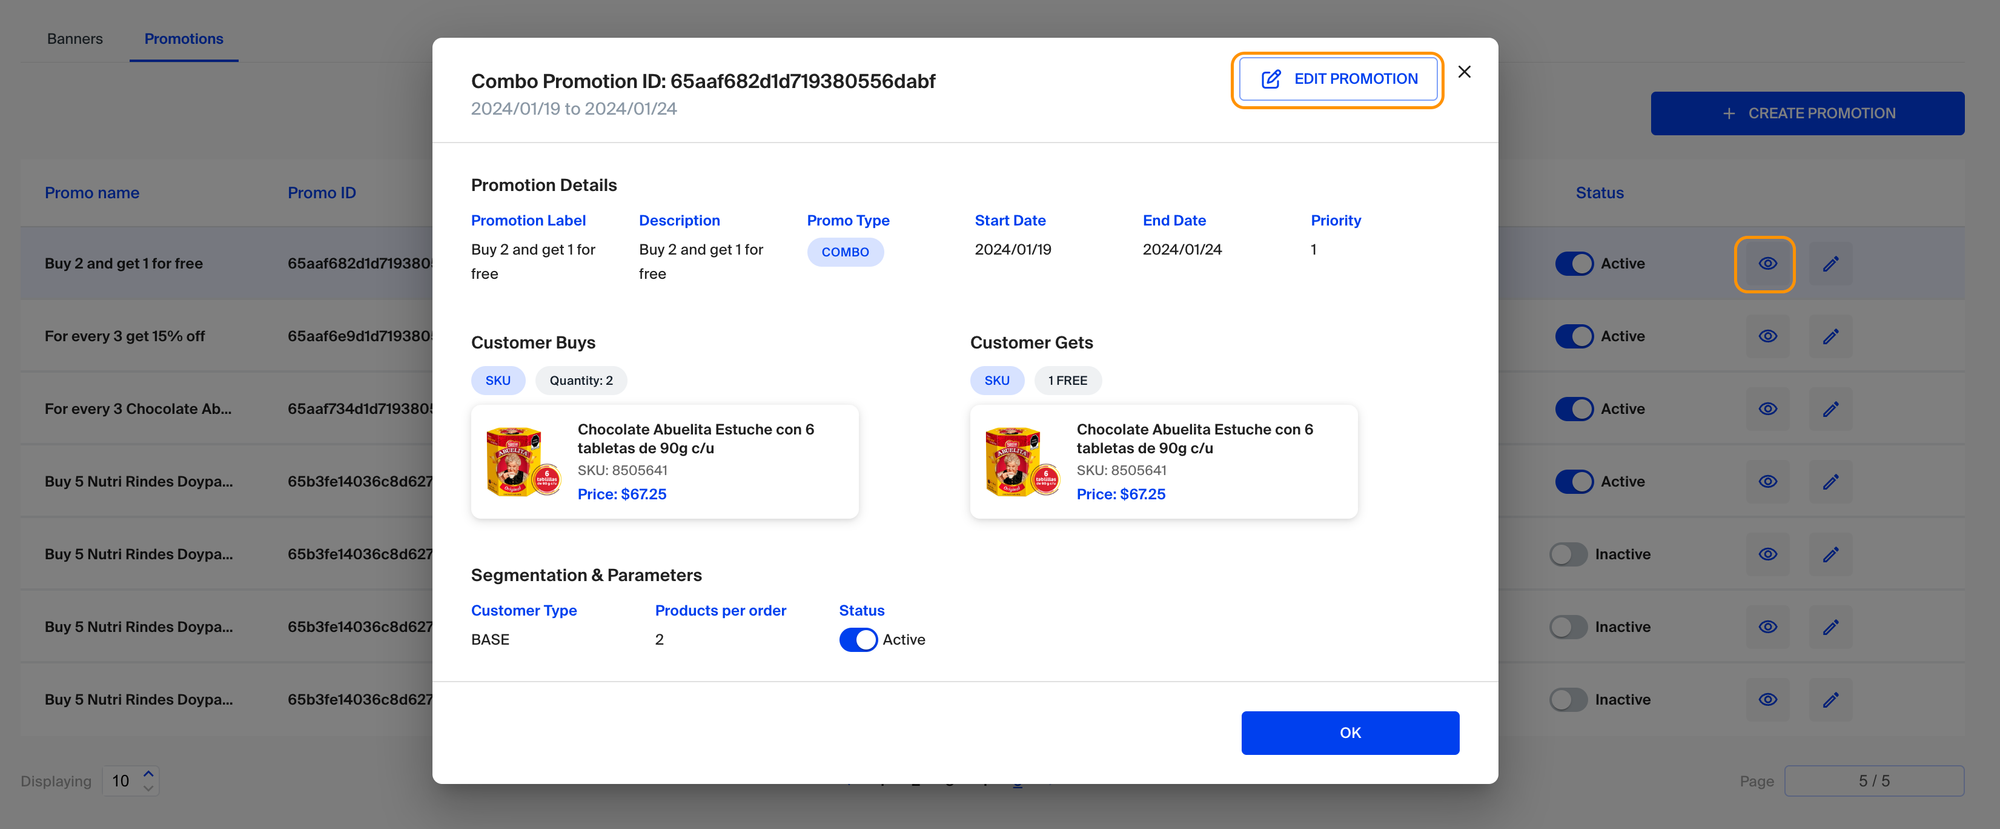
Editing a Promotion
In the promotions list, you can view the details of the promotion and edit it.
Updated 4 months ago