Order Reminders and Abandoned Cart Notifications
When to use them
- Order Reminders: when you want to notify a customer that created an order with the store at some point but hasn't made any new orders recently.
- Abandoned Cart: when you want to notify a customer that they started to add items to a cart but left it inactive for a while.
Configuration
There are configurations to be done in two places: the first one is in Yalo Studio, where you need to create a WhatsApp message template; the second one is in Commerce, which can be done either through Headless Admin API or Commerce Manager, also in Yalo Studio.
Creating a WhatsApp message template
Both Order Reminder and Abandoned Cart notifications need a WhatsApp message template when sending the notification. You need an approved template for it to work.
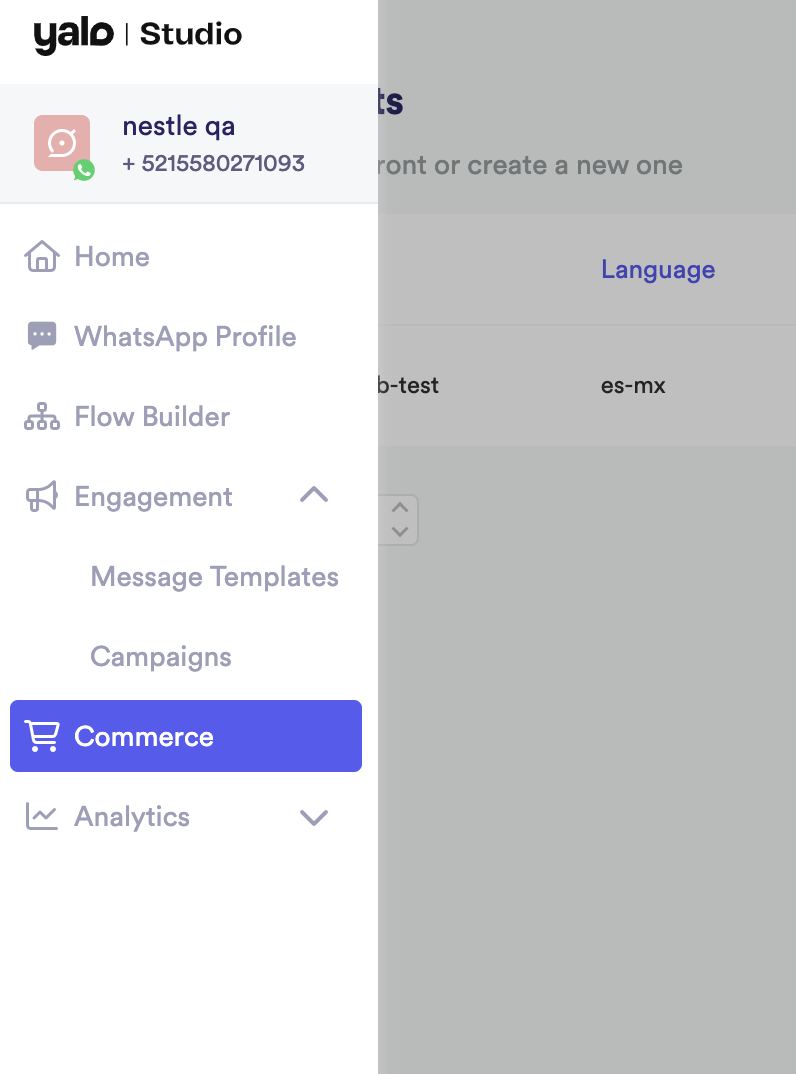
To create a template, head over to Yalo Studio and select an account. We'll be using Nestle QA on this example.
In the menu, select Engagement → Message Templates → Create New
Input the data for your template. In this example, we'll be using a button with a URL, so the user can click on it and go directly to Cinnamon and see the store's catalog. The staging URL is: https://commerce-staging.yalochat.com/
The button will have a dynamic URL, but we need to configure its prefix. Later, when creating the notification, we'll only need to pass the rest of the URL.
For the next steps, we'll use the Template ID, which can be seen in the right-hand side of the screen.
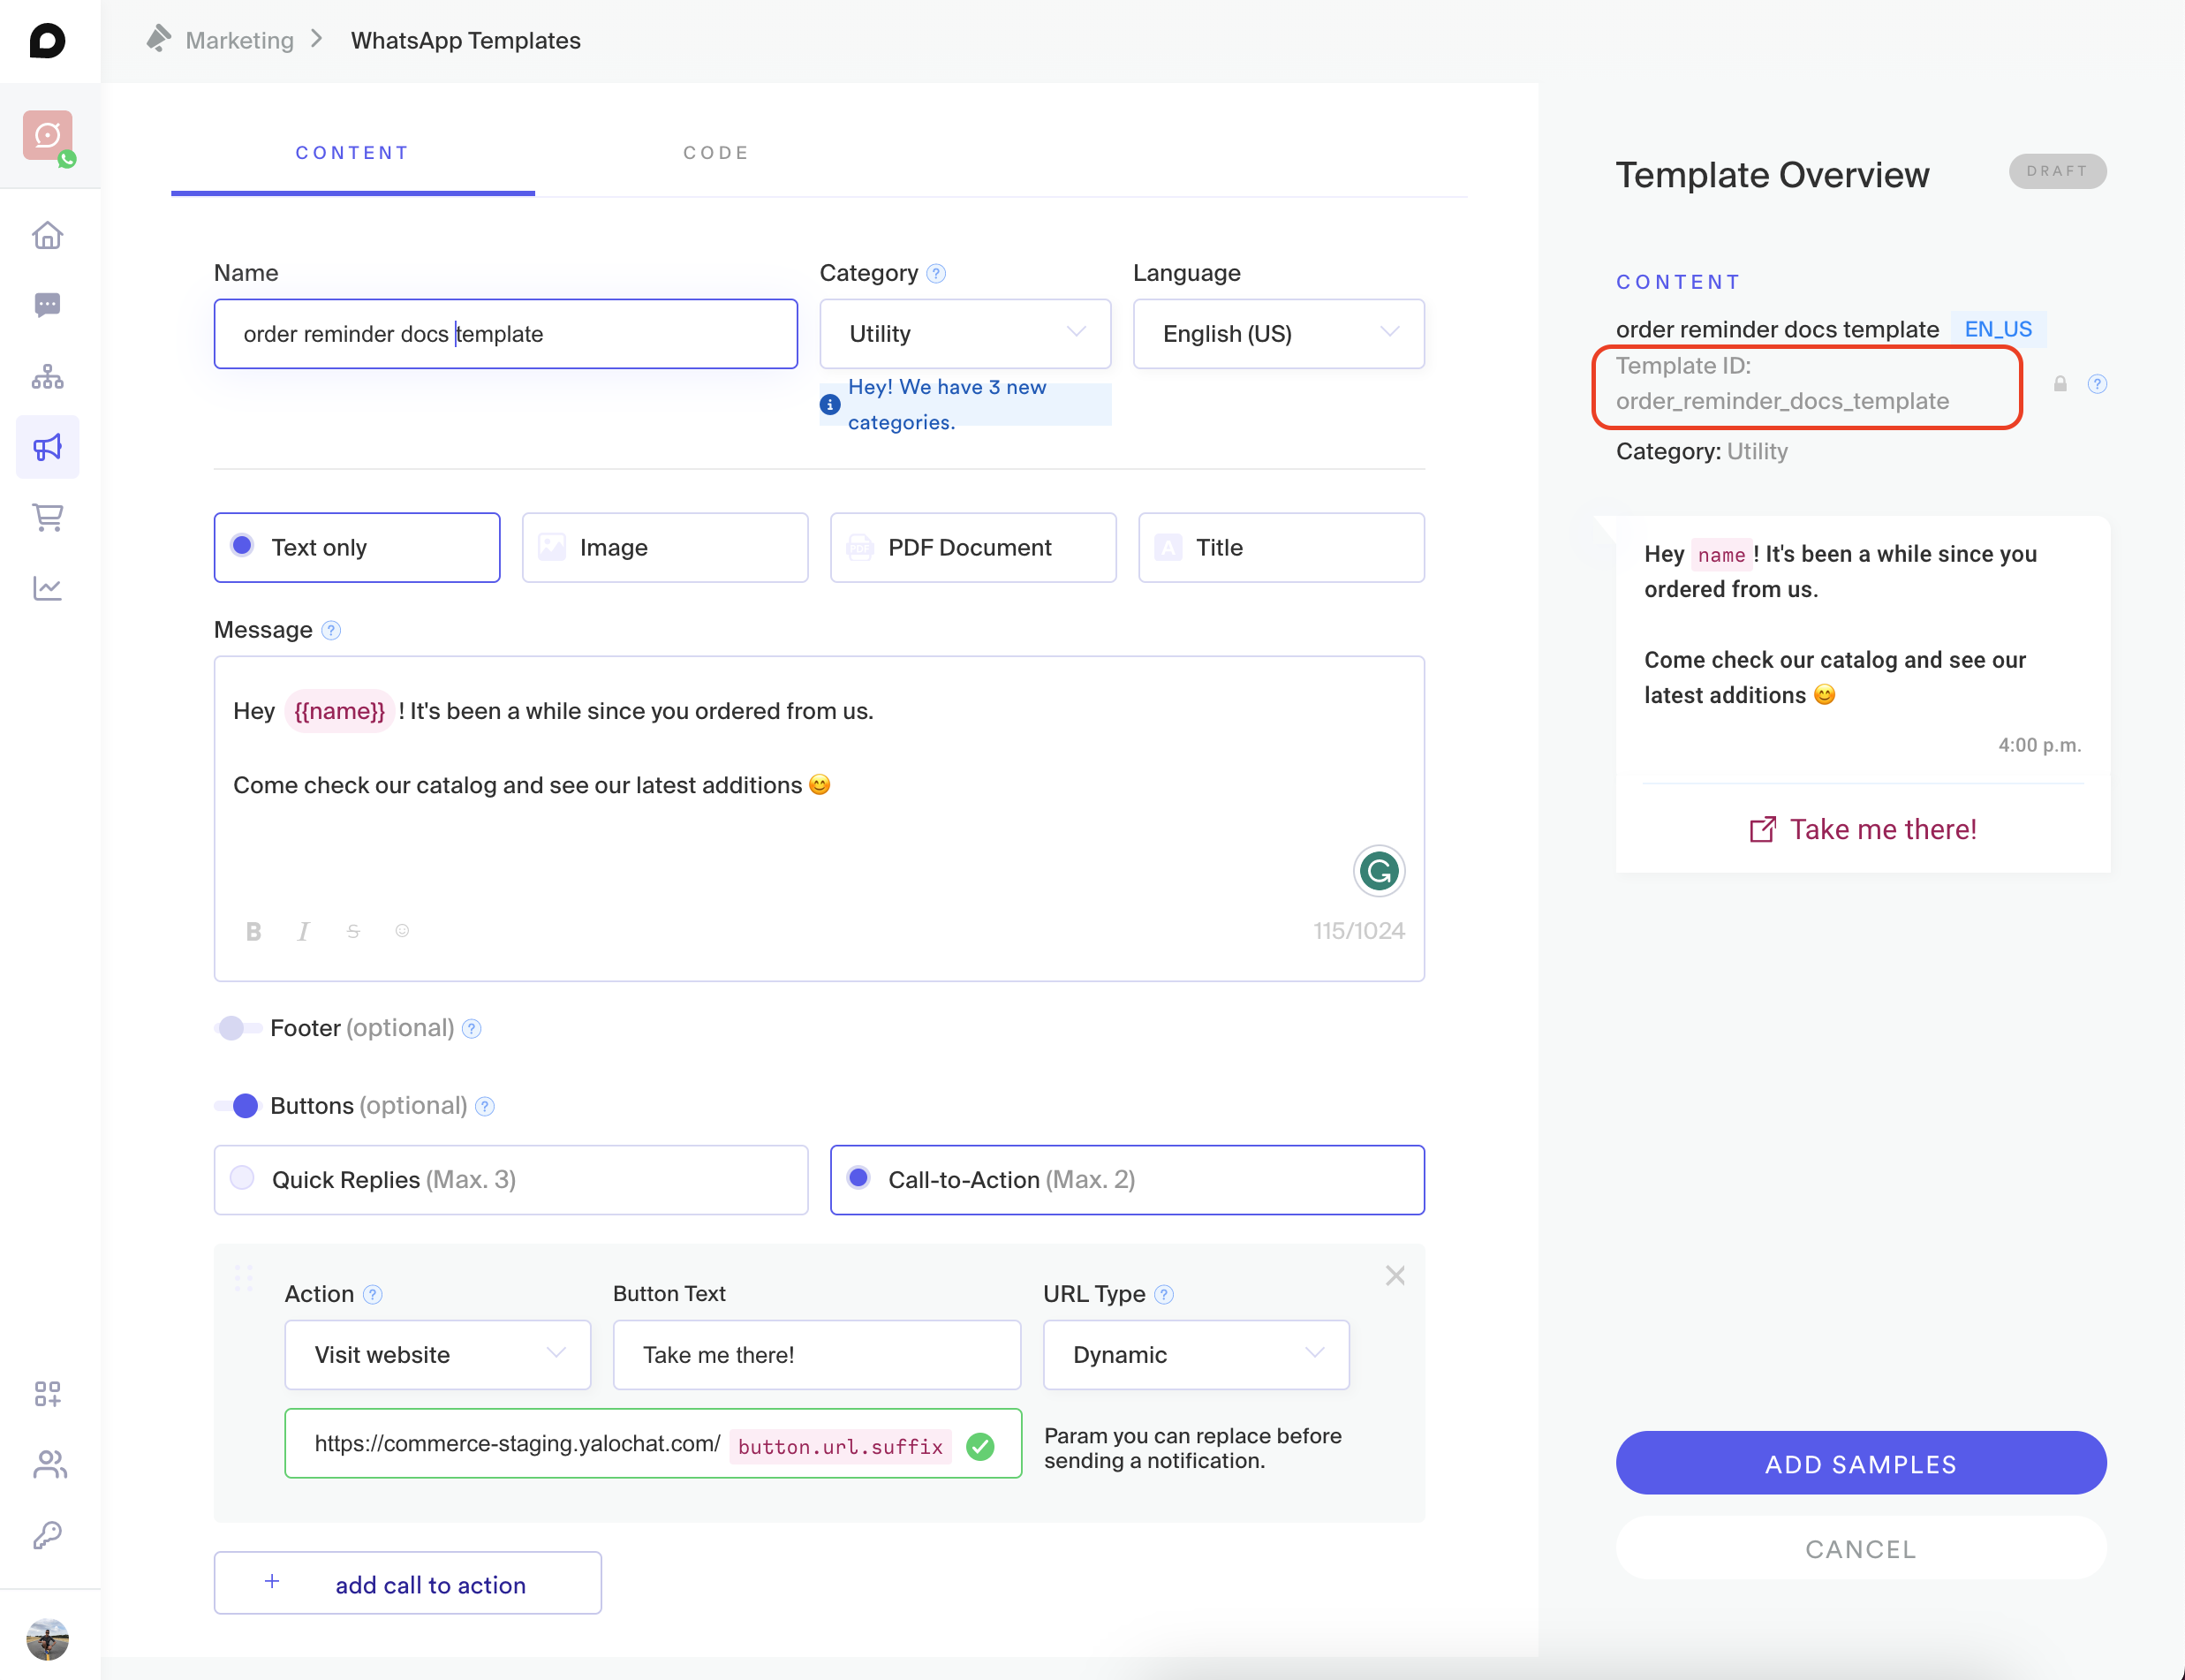
Finally, add samples and submit your template for review. The samples are an example of the parameters you plan to pass to the template.
The template we've just created will have the *name and the button.url.suffix parameters, so we need to provide examples for both. Since we defined the URL ***prefix*** in the previous step, we need to give an example of a full URL that starts with that prefix; we'll use commerce-staging.yalochat.com/commerce-promo-stage/63f6a9211c79f164da707723, which is what a simple Cinnamon URL looks like.

Your template will be pending review and you should have a result in about 15 minutes. We expected the template status to be changed to Approved. We can only use templates that have been approved by WhatsApp.

Once your template is approved, you're all done with the template configuration and can go to the next steps.
Configuring the notifications in Headless Admin API
In Headless Admin API, we're going to update our storefront with the notification configuration. Here's an example of how to do it:
mutation UpdateStorefront($data: UpdateStorefrontInput!, $name: String) {
  updateStorefront(data: $data, name: $name) {
    name
    configuration {
      notifications {
        type
        templateId
        studioAccountId
        botSlug
        enabled
        notificationAtHours
        notificationOnDays
        priority
      }
      i18n {
        timezone
      }
    }
  }
}
{
  "name": "crazyquarter3",
  "data": {
    "configuration": {
      "i18n": {
        "timezone": "America/Sao_Paulo"
      },
      "notifications": [
        {
          "botSlug": "nestle-mx-b2b-staging",
          "enabled": true,
          "notificationAtHours": [
            12
          ],
          "notificationOnDays": [
            "SATURDAY"
          ],
          "studioAccountId": "nestle-mx-b2b-staging",
          "templateId": "order_reminder_docs_template",
          "type": "ORDER_REMINDER",
					"thresholdInMinutes": 10080 // 7 days
        },
      ],
    }
  }
}
Here's a quick explanation of what each field does:
- botSlug: is the workflow name this storefront is configured to use;
- enabled: whether the notifications should be sent or not;
- notificationAtHours: an array of integers [0-23] that represent when the notification services should check for new notifications to send to the customers;
- notificationOnDays: an array of strings representing the days of the week [”MONDAY” - “SUNDAY”]. It configures what days of the week the notification services should check for new notifications to send to customers;
- studioAccountId: is the ID of the account we selected in Yalo Studio. In our case, it was Nestle QA, which has ID (or slug, if you will)
nestle-mx-b2b-staging; - templateId: the WhatsApp message template this notification will use. In our case, it is
order_reminder_docs_template, the ID of the template we created in previous steps; - *type: the notification type. This is important because each type of notification is processed by a different service. It can either be
ORDER_REMINDERorABANDONED_CART; - thresholdInMinutes: optional field. It represents the minimum elapsed time after the event happened before we send the notification. For example, if we had the last customer interaction with their cart at 11:30 AM and we check for new notifications only at 12:00 PM but we have a threshold of 60 minutes, the abandoned notification will not be sent this time, because only 30 minutes have passed.
Once we update our storefront with the notification configuration, a scheduler will be created and will execute according to the schedule defined in notificationOnDays and notificationAtHours.
⚠️ The timezone is required when configuring notifications. Make sure your storefront has it in the `configuration.i18n.timezone` field or pass it as an argument in the update operation, just like we have in the example above. ⚠️ From a business perspective, it makes sense that the `thresholdInMinutes` is shorter periods for Abandoned Cart (like 15 minutes, 60 minutes) but much longer periods for Order Reminders, like 7 or 14 days. Make sure to convert the days to minutes when configuring the threshold.Configuring the notifications in Commerce Manager
Alternatively, we can configure the notifications in Commerce Manager.
To do that, we need to go to Yalo Studio, select the account we want and in the menu on the left-hand side, select Commerce.
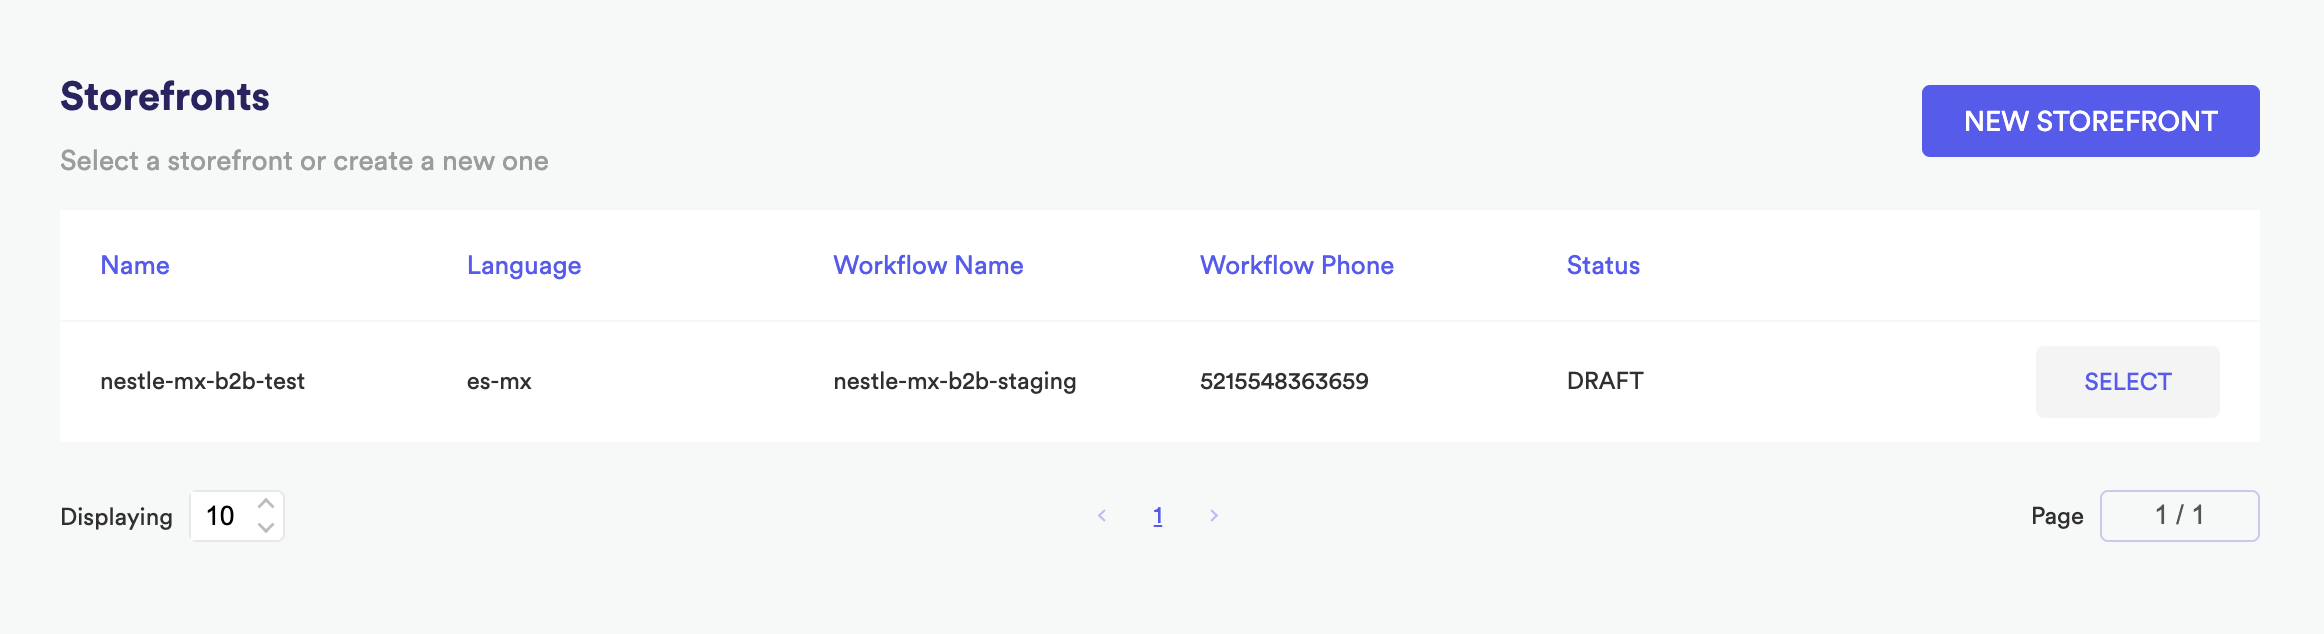
A list of storefronts will be displayed. Select the one you want to change:
In the Business Rules field, turn on the Order Reminder field and fill in the information:
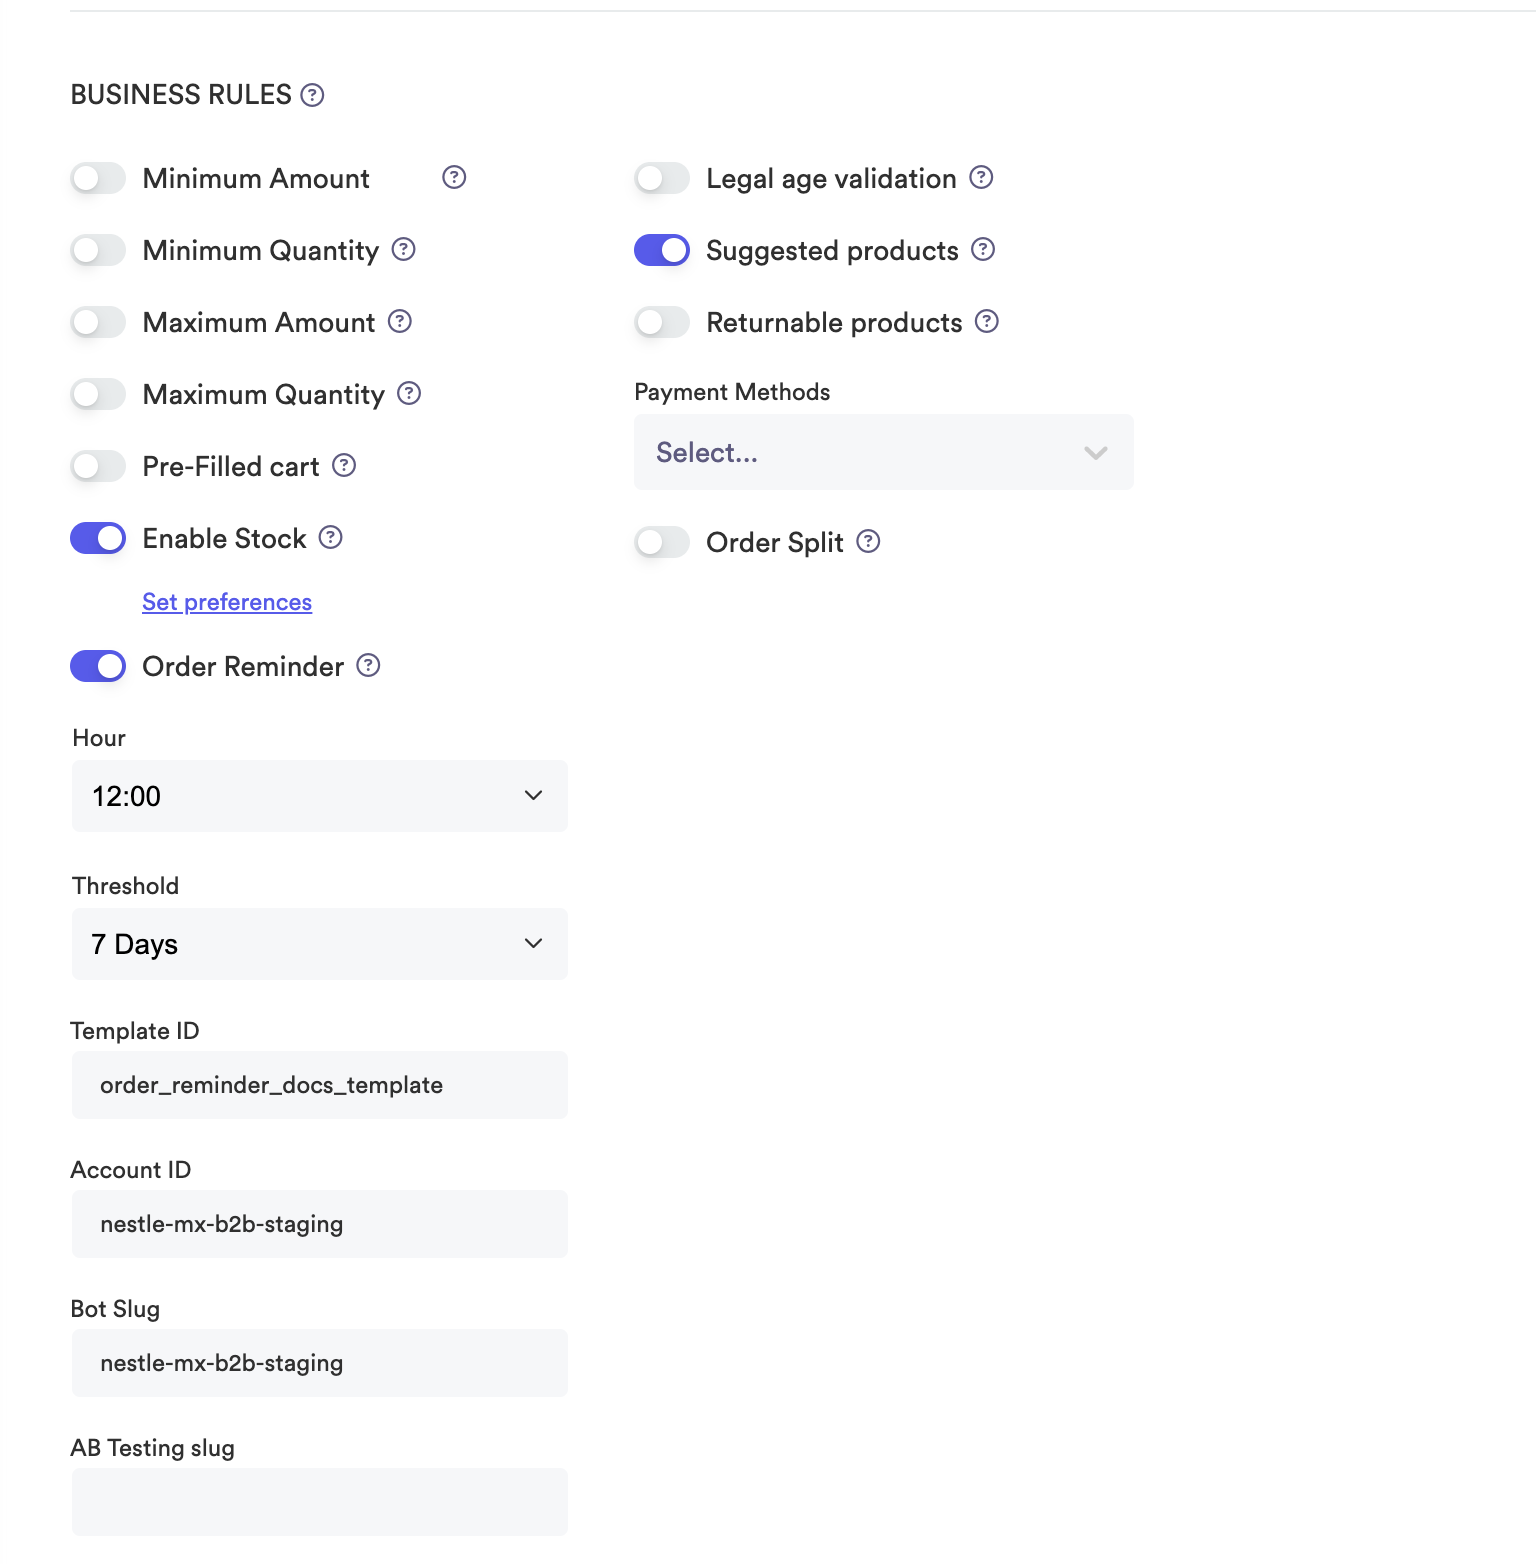
Click Save and you're all done!
Getting the notification on your phone
The notifications will be sent in the following scenarios, depending on your notification type:
- Abandoned Cart: you created a session, visited the catalog, and added items to your cart, but didn't finish the order and stopped interacting with the app for a certain amount of time (defined by the threshold);
- Order Reminder: you created an order at some point but haven't created any new orders lately (defined by the threshold).
The notification will use the template and replace the parameters accordingly, and it will look like this:
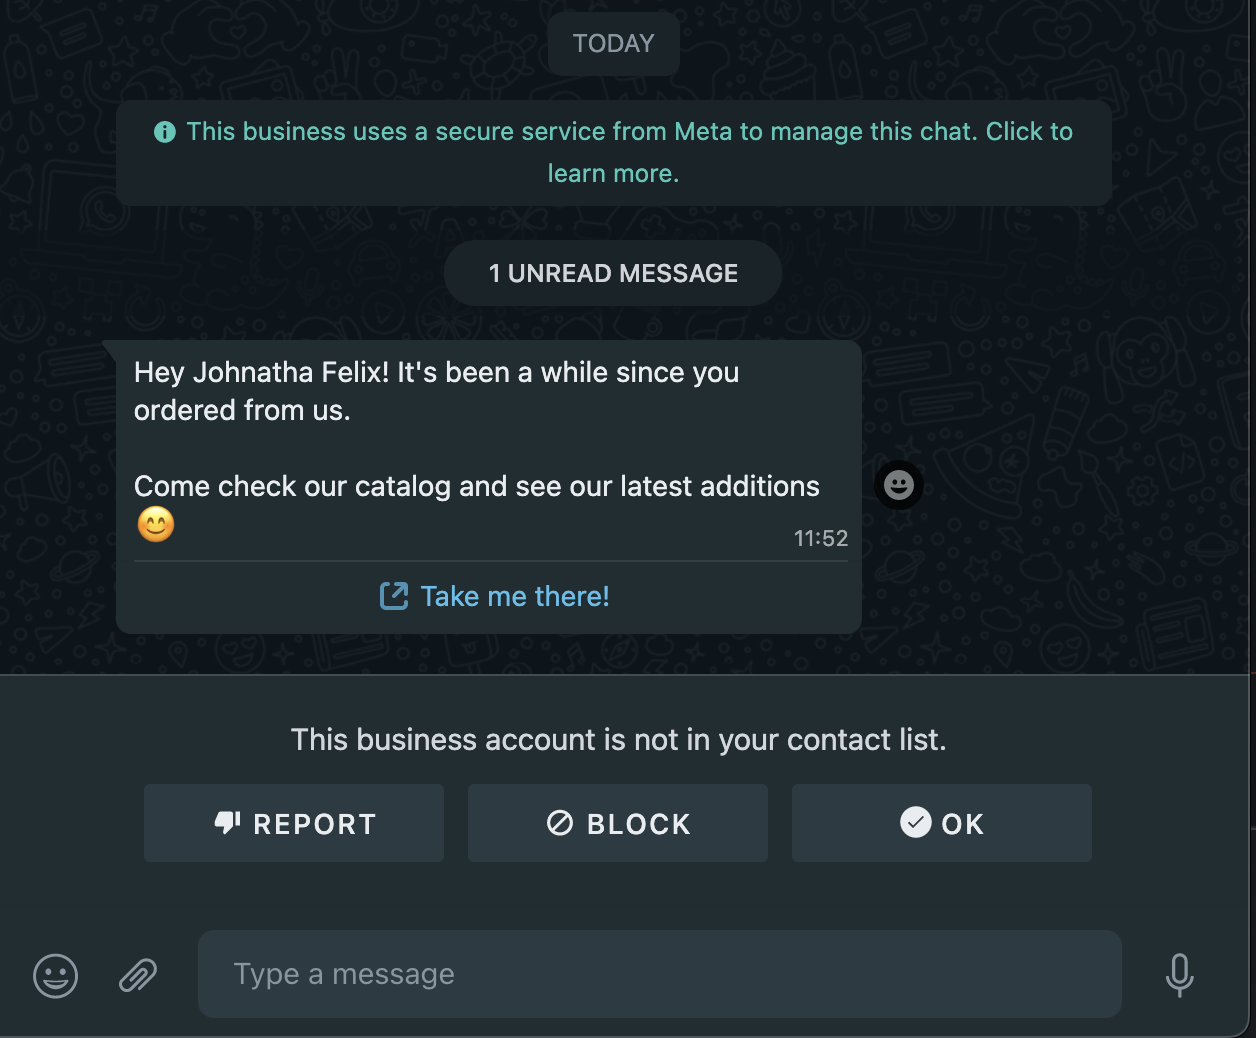
Once you click on the Take me there! button, you will be taken to Cinnamon and see the catalog there.
⚠️ For ***Order Reminder***, the link in the button takes the user to the catalog. For ***Abandoned Cart***, it takes to the cart itself, so the user can quickly place their order.Configuring an A/B test for the notifications
You can configure an A/B test for both Order Reminder and Abandoned Cart notifications. Currently, we support A/B tests with two groups: SEND and NO_SEND. As their names imply, if a customer is in the NO_SEND group, the notification will not be sent.
To configure an A/B test, you need its experiment slug, which you can get from the Experiments API provided by the ML Team. You can get some information about that API here.
All you need to do then is configure the experiment in the Headless Admin API when configuring the notification, using the abTestingSlug field:
mutation UpdateStorefront($data: UpdateStorefrontInput!, $name: String) {
  updateStorefront(data: $data, name: $name) {
    name
    configuration {
      notifications {
        type
        templateId
        studioAccountId
        botSlug
        enabled
        notificationAtHours
        notificationOnDays
        priority
				**abTestingSlug**
      }
      i18n {
        timezone
      }
    }
  }
}
{
  "name": "crazyquarter3",
  "data": {
    "configuration": {
      "i18n": {
        "timezone": "America/Sao_Paulo"
      },
      "notifications": [
        {
					**"abTestingSlug": "send-no-send-ab",**
          ...,
        },
      ],
    }
  }
}
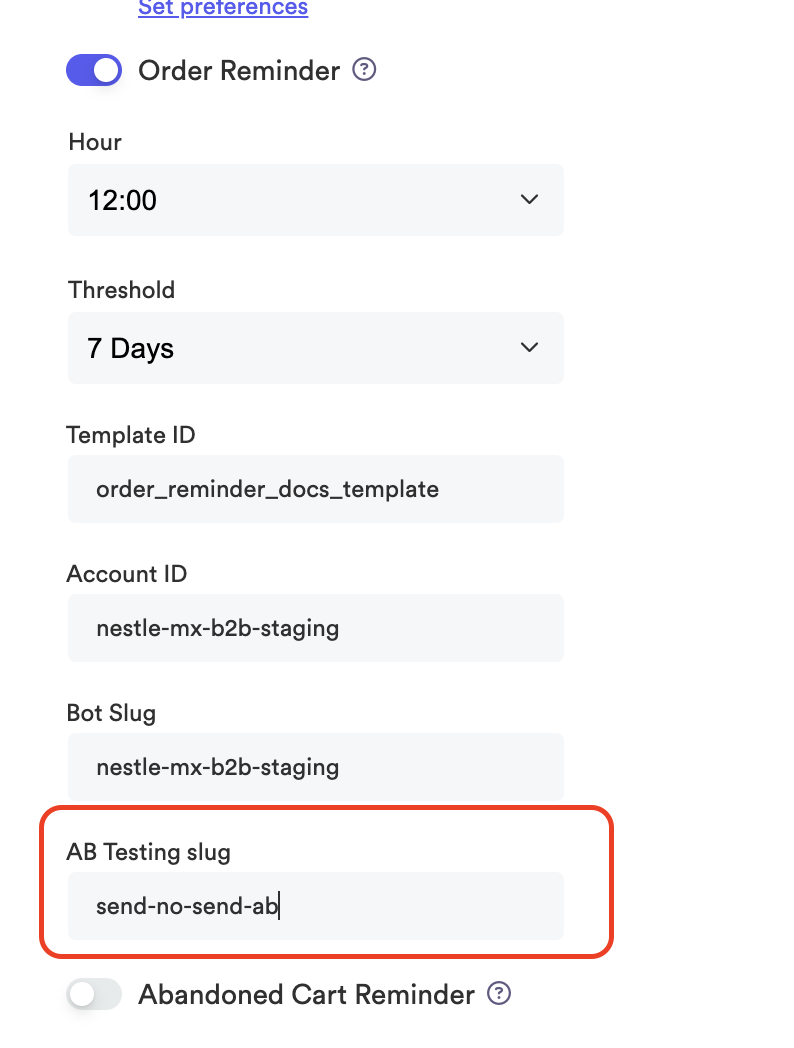
Or, in the Commerce Manager, using the AB Testing slug field:
Before sending the notification, the Notification Sender service will check whether an A/B test is present and which is the customer's group. If the customer is in the NO_SEND group, the notification won't be sent. Also, if the Experiments API is down for some reason, the notification will not be sent as well. If no experiment is configured, then the notifications are always sent.
A configuration that might be needed for new studio accounts
The Notification Sender service uses the Notifications API provided by the Engagement Team.
Whenever a message is sent through that API, the Notification Sender service expects a response that looks like this:
{
    "success": true,
    "id": "6425a24026cf9a03a66aadcf",
    "message_ids": [
        "6425a24026cf9a03a66aadd0"
    ]
}
However, not all accounts have a response like that and might simply not return anything apart from the "success": true. If that's the case for an account you're using, please ask the Engagement Team to enable the API feedback for that account.
Possible Errors
I didn't get a notification
- If you have
thresholdInMinutesconfigured, make sure that enough time has passed and the threshold has been reached; - If you have
abTestingSlugconfigured, make sure that your phone number is not in the NO_SEND group; - If it was a notification of type Abandoned Cart, make sure that your cart has items and that the session is in the
IN_PROGRESSstate; - If it was a notification of type Order Reminder, make sure that you have made orders before for that customer.
Updated over 1 year ago